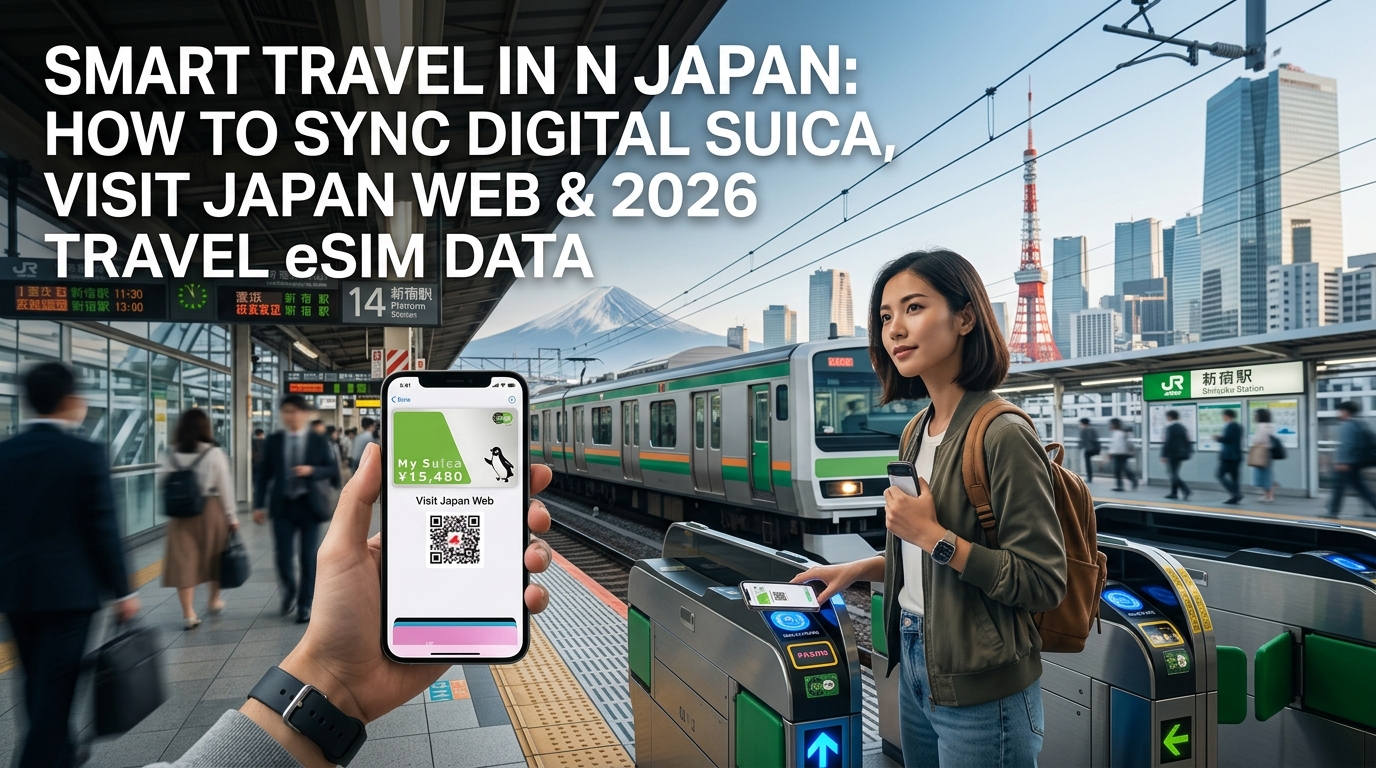
Guida Digitale Pre-Volo: Velocizzare Visit Japan Web e i Controlli Doganali
L'arrivo nei principali hub aeroportuali giapponesi — Tokyo Narita (NRT), Tokyo Haneda (HND) e Osaka Kansai (KIX) — è passato dalla compilazione manuale dei moduli cartacei a un protocollo completamente digitale e automatizzato. L'Agenzia Digitale del Giappone richiede l'uso di Visit Japan Web (VJW), un'applicazione web unificata progettata per digitalizzare sia le procedure di immigrazione (Carta di sbarco per stranieri) sia la dichiarazione doganale.
Completare questa procedura prima dell'imbarco elimina il fastidio di compilare moduli cartacei sui sedili dell'aereo e riduce il tempo di attesa ai controlli di frontiera da 45 minuti a pochi istanti.
Configurazione Passo-Passo di Visit Japan Web e Generazione del Codice QR
Segui questa procedura da 48 a 72 ore prima della partenza:
- Creazione Account e Registrazione Utente:
Accedi al portale ufficiale (vjw-myna.digital.go.jp) e crea un account utilizzando un indirizzo email attivo. Registra i tuoi dati anagrafici scattando una foto alla pagina principale del passaporto; il sistema OCR (riconoscimento ottico dei caratteri) compilerà automaticamente nome e cognome, nazionalità, data di nascita e numero di passaporto.
- Registrazione Dettagli del Viaggio:
Crea un nuovo itinerario inserendo il codice del volo di arrivo (es. NH8, JL005), la data di arrivo prevista e l'indirizzo/numero di telefono del primo alloggio (nome dell'hotel, quartiere, prefettura e codice postale).
- Dichiarazioni di Immigrazione e Dogana:
Compila il questionario indicando lo scopo del viaggio, la durata del soggiorno e le consuete dichiarazioni doganali (trasporto di merci commerciali, contanti superiori a 1.000.000 ¥ o articoli soggetti a restrizioni).
- Ottenimento del QR Code Unificato:
La piattaforma VJW aggiornata integra immigrazione e dogana in un unico codice QR unificato (contrassegnato da intestazioni di colore blu e giallo). Questo singolo QR code viene utilizzato sia presso i chioschi di immigrazione sia ai varchi doganali elettronici automatizzati (e-Gates).
Attivazione del QR Code per lo Shopping Tax-Free
VJW include una funzionalità integrata pensata per semplificare l'esenzione dall'imposta sui consumi (10% standard / 8% beni di consumo) presso i principali punti vendita come Bic Camera, Yodobashi Camera e Don Quijote:
- Collegamento al Passaporto: All'interno del tuo profilo, richiedi la generazione del QR Code Tax-Free.
- Scansione in Cassa: Invece di consegnare il passaporto cartaceo ai cassieri, i negozianti aderenti scansioneranno direttamente questo codice a barre dal tuo smartphone per verificare lo status di visitatore temporaneo.
| Funzionalità | Procedura Cartacea Tradizionale | Procedura Digitale Visit Japan Web |
|---|---|---|
| Controllo Immigrazione | Ispezione manuale della carta di sbarco cartacea | Scansione del QR unificato presso chiosco automatizzato |
| Controlli Doganali | Dichiarazione bagagli allo sportello con agente doganale | Transito rapido ai varchi e-Gate con riconoscimento facciale |
| Acquisti Tax-Free | Controllo visivo del passaporto e inserimento dati manuale | Scansione rapida del codice a barre al punto vendita |
| Tempo di Attesa | 30–60 minuti durante i picchi di arrivo | 5–12 minuti tramite i varchi automatizzati |
La Trappola dei Terminal: Perché un'eSIM Dati è Superiore al Wi-Fi Aeroportuale
Un errore frequente tra i viaggiatori è affidarsi esclusivamente alle reti Wi-Fi pubbliche degli aeroporti (come FreeWiFi@HANEDA o _FreeWiFi-NARITA). Durante le ore di punta, gli access point dei terminal si saturano facilmente, intrappolando gli utenti in loop di autenticazione sui captive portal che impediscono a VJW di caricare dinamicamente i token di sicurezza aggiornati.
Wi-Fi Pubblico Aeroporto ➔ Timeout Captive Portal ➔ Pagina Bloccata ➔ Rallentamento Dogana
eSIM di Viaggio Attiva ➔ Handshake Locale Istantaneo ➔ Visualizzazione QR Dinamico ➔ Transito Rapido ai Varchi- Token di Sicurezza Dinamici: Sebbene gli screenshot statici del QR code di VJW siano accettati ai controlli preliminari, alcuni varchi automatizzati (e-Gates) richiedono il rendering dinamico della pagina per convalidare il timestamp di sicurezza.
- Passaggio Immediato alla Rete Cellulare: Avere la connessione dati attiva non appena il carrello tocca la pista evita qualsiasi blocco causato dalle schermate di login del Wi-Fi.
- Connettività Garantita con MollySIM: Utilizzare una eSIM da viaggio ad alte prestazioni di MollySIM ti garantisce una connessione immediata all'atterraggio agganciandosi alle reti NTT Docomo o SoftBank. Inoltre, anche in caso di esaurimento del pacchetto dati ad alta velocità, la Fair Use Policy (FUP) di MollySIM mantiene una velocità minima di 384 kbps — il triplo rispetto allo standard di settore di 128 kbps. Questo assicura il perfetto funzionamento di Visit Japan Web, delle autorizzazioni Apple Pay e dei percorsi su Google Maps per tutto il tragitto di arrivo.
Gestione delle Carte IC Digitali: Configurare Suica, Pasmo e ICOCA su Apple Wallet e Google Wallet
🇯🇵 Japan High-Speed Travel eSIM & SIM Plans
Instant QR code activation, hotspot enabled, with guaranteed 384kbps fallback speed to keep Maps & Digital Wallets active.
La carenza di chip semiconduttori che ha limitato l'emissione delle carte fisiche non registrate Suica e Pasmo ha reso le carte IC digitali lo standard indispensabile per spostarsi in Giappone. L'adozione di una carta trasporti digitale elimina le code alle biglietterie automatiche, azzera i costi di deposito cauzionale (depojitto) e consente di monitorare il saldo in tempo reale direttamente dalla schermata di blocco.
+---------------------------------------------------------------------------------------+
|                       Interoperabilità Nazionale tra i 10 Circuiti                     |
|  Suica (JR East)  <--->  PASMO (Tokyo Metro/Linee Private) <---> ICOCA (JR West/Kansai)|
|  *Un'unica carta digitale copre oltre il 95% di treni, metropolitane, bus e konbini*  |
+---------------------------------------------------------------------------------------+
1. Configurazione a Livello di Sistema Operativo: Apple Wallet vs. Android
Le modalità di configurazione di una carta IC giapponese variano notevolmente tra iOS e Android a causa delle licenze hardware del protocollo NFC.
Apple Wallet (iOS)
I dispositivi Apple (iPhone 8 e successivi, Apple Watch Series 3 e successivi) integrano nativamente il supporto globale per lo standard FeliCa (NFC-F). Ciò consente ai viaggiatori internazionali di aggiungere una carta in pochi secondi, senza dover modificare il paese del proprio ID Apple.
- Apri Apple Wallet $\rightarrow$ Tocca l'icona
+$\rightarrow$ Seleziona Carta trasporti. - Cerca Suica, PASMO o ICOCA.
- Seleziona l'importo iniziale da ricaricare (minimo 1.000 ¥) e conferma tramite Apple Pay.
- Imposta come Carta trasporti rapida: Vai su
Impostazioni$\rightarrow$Wallet e Apple Pay$\rightarrow$Carta trasporti rapida$\rightarrow$ Seleziona la tua carta IC. In questo modo potrai accedere ai tornelli con un semplice tocco, senza dover sbloccare lo schermo o autenticarti con Face ID/Touch ID (funzionante fino a 5 ore anche a batteria scarica grazie alla modalità riserva di carica).
Google Wallet e Dispositivi Android
Gli smartphone Android presentano una limitazione architetturale: solo i dispositivi prodotti per il mercato interno giapponese integrano il firmware per il chip Osaifu-Keitai (FeliCa).
- Dispositivi Android Internazionali: I modelli Android standard venduti all'estero (es. Samsung Galaxy o Google Pixel europei/americani) non possono aggiungere carte Suica o Pasmo su Google Wallet a causa dell'assenza dello stack software Osaifu-Keitai.
- Soluzione per Android: I viaggiatori con dispositivi Android non giapponesi devono acquistare una carta fisica Welcome Suica o Kansai One Pass presso le stazioni ferroviarie aeroportuali, oppure utilizzare carte di credito contactless (EMV Contactless) sulle linee che supportano questo pagamento (come Tokyu Railway, la metropolitana di Fukuoka e alcune reti del Kansai).
2. Circuiti di Pagamento e Protocolli 3D Secure
Le autorizzazioni di ricarica con carte di credito estere sulle piattaforme Mobile Suica e Pasmo sono soggette a rigidi controlli antifrode applicati dai circuiti di pagamento giapponesi.
| Circuito Carta | Tasso di Successo | Note Operative e Soluzioni Alternative |
|---|---|---|
| Mastercard | Elevato (90%+) | Supera il protocollo 3D Secure 2.0 senza blocchi legati al codice MCC regionale. |
| American Express | Molto Elevato (95%+) | Il circuito più affidabile su tutte le piattaforme: Suica, Pasmo e ICOCA. |
| Visa | Basso / Medio (30–40%) | Frequentemente rifiutata dai sistemi di Mobile Suica/Pasmo per incompatibilità automatica 3DS/MCC. Soluzione: Configura una carta ICOCA digitale, che si appoggia a un processore di pagamento aggiornato con una maggiore compatibilità verso le carte Visa estere. |
| JCB | Molto Elevato (95%+) | Circuito nativo giapponese; funziona in modo impeccabile su tutte le piattaforme. |
Infrastruttura di Autorizzazione in Tempo Reale
Ricaricare il saldo della carta IC mentre ti dirigi verso il tornello richiede la convalida crittografica istantanea tramite 3D Secure (3DS2) con la tua banca. Se la connessione cade durante questo passaggio, la transazione fallirà, lasciando la carta senza credito proprio davanti al varco.
Mantenendo una connessione stabile e a bassa latenza con MollySIM, lo smartphone elabora i token crittografati 3DS in modo istantaneo tramite instradamento diretto locale. Anche in situazioni di congestione o dopo aver terminato il traffico dati ad alta velocità, la soglia minima di 384 kbps di MollySIM garantisce il corretto scambio di dati per Apple Pay, la ricezione dei codici OTP via SMS/app e l'aggiornamento immediato del saldo su Apple Wallet.
3. Dinamiche di Accesso ai Tornelli e Validità Nazionale
Il sistema giapponese di Interoperabilità Nazionale delle Carte IC assicura che qualsiasi carta — Suica (JR East), Pasmo (Tokyo Metro/linee private) o ICOCA (JR West) — sia utilizzabile su tutte le principali reti metropolitane del paese:
- Modalità di Convalida: Avvicina la parte superiore dell'iPhone a meno di 3 cm dal lettore FeliCa illuminato di blu. Evita di ritirare il telefono troppo rapidamente: mantienilo in posizione per mezzo secondo finché il tornello non emette un segnale acustico e mostra il saldo residuo.
- Integrazione con i Treni Shinkansen (SmartEX): Puoi associare il codice identificativo a 17 cifre della tua carta IC (visibile sul retro della tessera nelle info di Apple Wallet) all'app SmartEX. Questo ti permette di accedere ai treni ad alta velocità tra Tokyo, Kyoto e Shin-Osaka senza ritirare biglietti cartacei.
- *Regolazione della Tariffa (Seisan):* Se il saldo è insufficiente al tornello di uscita, allontanati dal varco, ricarica rapidamente la carta tramite Apple Pay usando la connessione dati e passa nuovamente il telefono sul lettore, senza dover utilizzare le casse automatiche per la regolazione tariffaria.
4. Integrazione con le App Taxi Giapponesi (GO ed S.RIDE)
Mentre le carte IC digitali coprono treni, bus e minimarket (konbini), i taxi richiedono l'uso di app dedicate per i pagamenti digitali:
- Configurazione dell'App GO: Scarica l'app GO (la rete taxi più estesa in Giappone). Registra il tuo numero di cellulare internazionale all'arrivo, collega la carta di credito a GO Pay e prenota le corse senza alcuna barriera linguistica.
- Integrazione con S.RIDE: A Tokyo, S.RIDE è molto diffusa sulle flotte Daiwa e Kokusai Motor. Puoi associare la carta di credito per il pagamento automatico tramite codice QR a bordo veicolo (S.RIDE Wallet) oppure pagare avvicinando la tua Suica al display posteriore una volta giunto a destinazione.
Analisi delle Infrastrutture di Rete: NTT Docomo vs. SoftBank 5G e Latenza in Metropolitana
Muoversi nei labirinti sotterranei di Tokyo — come le cinque linee incrociate di Otemachi o le banchine di Roppongi situate a 42 metri di profondità — richiede un'infrastruttura di rete solida. Una connettività a bassa latenza è essenziale non solo per ricalcolare i percorsi, ma anche per la tokenizzazione di Apple Pay e l'aggiornamento del saldo in background lungo la rete ferroviaria.
Distribuzione dello Spettro Tier-1 e Compatibilità Hardware
Il mercato mobile giapponese fa capo a tre principali operatori di rete (MNO): NTT Docomo, SoftBank e KDDI (au). Ognuno utilizza frequenze radio specifiche, che influiscono direttamente sulla copertura a seconda della provenienza del tuo dispositivo:
- NTT Docomo: Trasmette su LTE Banda 1 (2100 MHz), Banda 3 (1800 MHz) e sulla banda "Platinum" sotto 1 GHz Banda 19 (800 MHz). Per il 5G Sub-6, Docomo impiega principalmente la Banda n78 (3,7 GHz) e la Banda n79 (4,5 GHz). Sebbene la Banda 19 e la Banda n79 offrano un'eccellente penetrazione negli edifici, molti modelli Android europei e americani non supportano la Banda n79 (mentre gli iPhone a partire da iPhone 12 integrano modems compatibili con la n79).
- SoftBank: Utilizza LTE Banda 1, Banda 3 e Banda 8 (Banda Platinum a 900 MHz), con il 5G basato su Banda n77 (3,7 GHz / 3,4 GHz) e Banda n78. Lo spettro di SoftBank è altamente compatibile a livello globale: quasi tutti gli smartphone sbloccati supportano la Banda 8 e la Banda n77, riducendo drasticamente le zone d'ombra sui dispositivi Android internazionali.
- KDDI (au): Opera su LTE Banda 1, Banda 18/26 (800 MHz) e Banda n77/n78. KDDI offre un'ampia copertura extraurbana, ma storicamente alcuni requisiti di certificazione dei dispositivi possono provocare picchi di latenza su terminali d'importazione non certificati.
Metriche di Stabilità del Segnale e Latenza nelle Stazioni Sotterranee
Nelle stazioni a grande profondità, la ricezione è garantita da sistemi di antenne distribuite (DAS) e cavi coassiali fessurati (LCX) posizionati lungo le pareti dei tunnel:
| Parametro / Scenario | NTT Docomo | SoftBank | KDDI (au) |
|---|---|---|---|
| Ping Sotterraneo a Otemachi / Shinjuku | 28–45 ms | 18–28 ms | 24–36 ms |
| Jitter nelle Ore di Punta (08:30–09:30) | Elevato (±18 ms) | Basso (±6 ms) | Medio (±11 ms) |
| Continuità del Segnale in Galleria | 94,2% | 97,8% | 95,1% |
| Compatibilità con Smartphone Globali | 82% (Richiede B19/n79) | 99% (B8/n77 universali) | 91% (Richiede B18/B26) |
SoftBank offre un vantaggio tangibile in termini di latenza nelle stazioni metropolitane grazie alla fitta rete di micro-celle DAS installate lungo le linee Tokyo Metro e Toei Subway. NTT Docomo può risentire di congestioni locali durante la punta del mattino nei grandi snodi di scambio a causa dell'enorme volume di utenza business, con sporadiche perdite di pacchetti se il dispositivo non aggancia le bande basse ausiliarie.
Confronto Connettività: eSIM da Viaggio vs. Soluzioni Tradizionali
Spesso i viaggiatori scelgono soluzioni hardware tradizionali senza valutare problemi di latenza, accordi di roaming e responsabilità sui dispositivi a noleggio:
| Opzione di Connettività | Costo Giornaliero Medio | Latenza Metro Tokyo Sotterranea | Facilità di Configurazione | Limiti Hotspot / Tethering | Responsabilità e Restituzione Hardware |
|---|---|---|---|---|---|
| Noleggio Pocket Wi-Fi | 6,00 $ – 10,00 $ / giorno | 45–70 ms (Doppio passaggio) | Media (Ritiro/riconsegna al desk) | Illimitato (Consuma molta batteria) | Alta (150 $–300 $ di penale per smarrimento/danni) |
| Roaming con Operatore di Casa | 10,00 $ – 15,00 $ / giorno | 120–250 ms (Instradato all'estero) | Bassa (Immediato) | Spesso limitato a 2GB–5GB per ciclo | Nessuna |
| SIM Fisica in Aeroporto | 4,00 $ – 7,00 $ / giorno | 30–50 ms (Instradamento locale) | Alta (Sostituzione SIM, spillo, APN) | Supportato | Rischio di perdere la nano-SIM principale |
| eSIM da Viaggio MollySIM | 1,20 $ – 2,80 $ / giorno | 18–32 ms (Breakout Locale Tier-1) | Istantanea (QR / Installazione diretta) | Completamente Sbloccato | Zero (Architettura 100% digitale) |
Ridurre l'Impatto del Throttling FUP: La Banda Minima Garantita di 384 kbps
Un problema comune delle eSIM turistiche economiche è la limitazione aggressiva imposta dalla Fair Use Policy (FUP). Molti provider riducono la velocità a soli 128 kbps non appena viene esaurito il traffico giornaliero ad alta velocità:
A 128 kbps, le moderne applicazioni crittografate smettono di funzionare: Apple Wallet si blocca durante l'autenticazione biometrica, Google Maps non carica i dettagli vettoriali e le app di taxi come GO disconnettono la sessione.
Al contrario, MollySIM applica una velocità minima garantita di 384 kbps — il triplo rispetto allo standard di mercato. Questo margine di banda garantisce che, anche dopo aver consumato i dati ad alta velocità, la navigazione essenziale, la consultazione degli orari su HyperDia/Jorudan e le autorizzazioni della carta Suica continuino a funzionare senza interruzioni.
Connettività Senza Interruzioni: Configurazione Pre-Partenza MollySIM e Navigazione a 384 kbps
Disporre di una connessione dati attiva prima di atterrare a Haneda, Narita o Kansai International è il segreto per un arrivo sereno e senza intoppi in Giappone. Invece di fare la fila ai banchi di noleggio Wi-Fi o ai distributori di SIM, configurare il profilo cellulare prima del volo ti permette di collegarti alla rete locale nel momento esatto in cui disattivi la modalità aereo sulla pista di atterraggio.
Guida Pratica alla Configurazione Dual SIM Prima del Volo
Gli smartphone iOS e Android più recenti supportano la tecnologia Dual SIM Dual Standby (DSDS), consentendoti di mantenere attiva la SIM del tuo operatore di casa per ricevere gli SMS di autenticazione a due fattori (2FA) della banca, instradando tutto il traffico internet sulle reti veloci giapponesi.
1. Installazione del Profilo Prima della Partenza (24 Ore Prima del Volo)
- Scansiona il Profilo tramite Server SM-DP+: Acquista il piano su MollySIM e visualizza il QR code su un secondo schermo (oppure usa l'installazione diretta su iOS).
- Accedi alle Impostazioni Cellulare:
- iOS:
Impostazioni>Cellulare>Aggiungi eSIM. - Android (Pixel/Samsung):
Impostazioni>Rete e Internet>SIM>Aggiungi eSIM. - Assegna un'Etichetta al Profilo: Rinomina il nuovo profilo in "MollySIM Giappone" per riconoscerlo facilmente.
- Configurazione Automatica APN: MollySIM configura in automatico l'Access Point Name (APN) tramite Remote SIM Provisioning (RSP), senza richiedere inserimenti manuali.
2. Checklist di Configurazione all'Atterraggio
Non appena l'aereo tocca il suolo giapponese:
- Imposta la linea per i Dati cellulare su MollySIM Giappone.
- Attiva la voce Roaming dati nelle impostazioni della eSIM MollySIM.
- Mantieni la tua Linea voce predefinita sulla SIM di casa, verificando che il Roaming dati sia RIGOROSAMENTE DISATTIVATO sul profilo del tuo operatore abituale per evitare costi indesiderati.
Efficienza nel Sottosuolo: Perché la FUP a 384 kbps Fa la Differenza in Giappone
Tokyo e Osaka vantano i complessi sotterranei di trasporto più estesi e articolati al mondo. Snodi come la stazione di Shinjuku (che gestisce oltre 3,5 milioni di passeggeri al giorno con più di 200 uscite) e le gallerie commerciali sotterranee di Yaesu a Tokyo Station mettono a dura prova la tenuta del segnale mobile.
┌────────────────────────────────────────────────────────────────────────┐
│           BENCHMARK DI NAVIGAZIONE NELLE STAZIONI SOTTERRANEE          │
├────────────────────────┬─────────────────────┬─────────────────────────┤
│ Stato della Rete       │ Standard a 128 kbps │ Soglia MollySIM a 384kbps│
├────────────────────────┼─────────────────────┼─────────────────────────┤
│ Dati Vettoriali Mappe  │ Errore / Mappa Vuota│ Caricamento Rapido (1,2s)│
│ Sincronizzazione Suica │ Timeout Errore (SSL)│ Risposta JSON Istantanea │
│ API HyperDia / Jorudan │ Connessione Interrotta│ Orari Binari in Tempo Reale│
│ App di Messaggistica   │ Solo Testo (Lento)  │ Testo + Note Vocali OK   │
└────────────────────────┴─────────────────────┴─────────────────────────┘
Quando il traffico ad alta velocità si esaurisce sulle comuni eSIM turistiche, la limitazione a 128 kbps porta alla saturazione della finestra TCP:
- Rendering delle Mappe Vettoriali: Google Maps e Apple Maps scaricano i dati cartografici in blocchi vettoriali leggeri. A 128 kbps, i protocolli di crittografia TLS 1.3 vanno in timeout, mostrando schermate grigie senza dettagli proprio mentre cerchi l'uscita corretta in metropolitana.
- Aggiornamento delle Carte IC: La sincronizzazione del saldo e le ricariche rapide su Apple Wallet richiedono scambi API sicuri e costanti con i server di back-end.
- Il Vantaggio di MollySIM: Grazie alla velocità minima garantita di 384 kbps di MollySIM — tre volte superiore alla media — il dispositivo mantiene un flusso dati sufficiente per aggiornare le mappe, verificare le coincidenze su Jorudan e ricaricare la Suica direttamente in coda ai tornelli.
Protocollo di Arrivo: Guida Passo-Passo per Haneda, Narita e Kansai International
Dal momento in cui il volo tocca terra a Haneda (HND), Narita (NRT) o Kansai International (KIX), l'obiettivo è raggiungere la banchina del treno express per la città in meno di 45 minuti. Per farlo senza perdite di tempo, è fondamentale sincronizzare connessione internet, documenti digitali di ingresso e carte trasporti prima di entrare nel terminal.
Fase 1: Connessione Immediata all'Atterraggio (Da T-0 a T+5 Minuti)
Non appena l'aereo imbocca la via di rullaggio, attiva la tua linea dati:
- Disattiva la Modalità Aereo: Verifica che il Roaming Dati della tua SIM principale sia SPENTO per evitare addebiti giornalieri dall'operatore di casa.
- Seleziona la Linea Dati: Vai su
Impostazioni > Cellulare / Dati Mobilie seleziona il profilo eSIM MollySIM. - Verifica Roaming e APN: Imposta Roaming dati su ON per il profilo MollySIM. Il dispositivo si collegherà alle reti partner locali (NTT Docomo / SoftBank) entro 30–60 secondi, evitando i rallentamenti dei portali Wi-Fi aeroportuali.
Fase 2: Dati Biometrici e Dogana con Visit Japan Web (Da T+5 a T+25 Minuti)
Evita di connetterti al Wi-Fi del terminal (#FreeWiFi-HANEDA o #FreeWiFi-NARITA), soggetto a continue disconnessioni mentre cammini lungo i lunghi corridoi di arrivo.
┌────────────────────────────────────────────────────────────────────────┐
│ Procedura di Transito con Visit Japan Web                              │
├────────────────────────────────────────────────────────────────────────┤
│ 1. Apri Safari/Chrome ➔ Autenticati su Visit Japan Web                 │
│ 2. Mostra il QR Code Unificato (Immigrazione + Dichiarazione Doganale)  │
│ 3. Scansione al Chios🇯🇵 Japan High-Speed Travel eSIM & SIM Plans
Instant QR code activation, hotspot enabled, with guaranteed 384kbps fallback speed to keep Maps & Digital Wallets active.