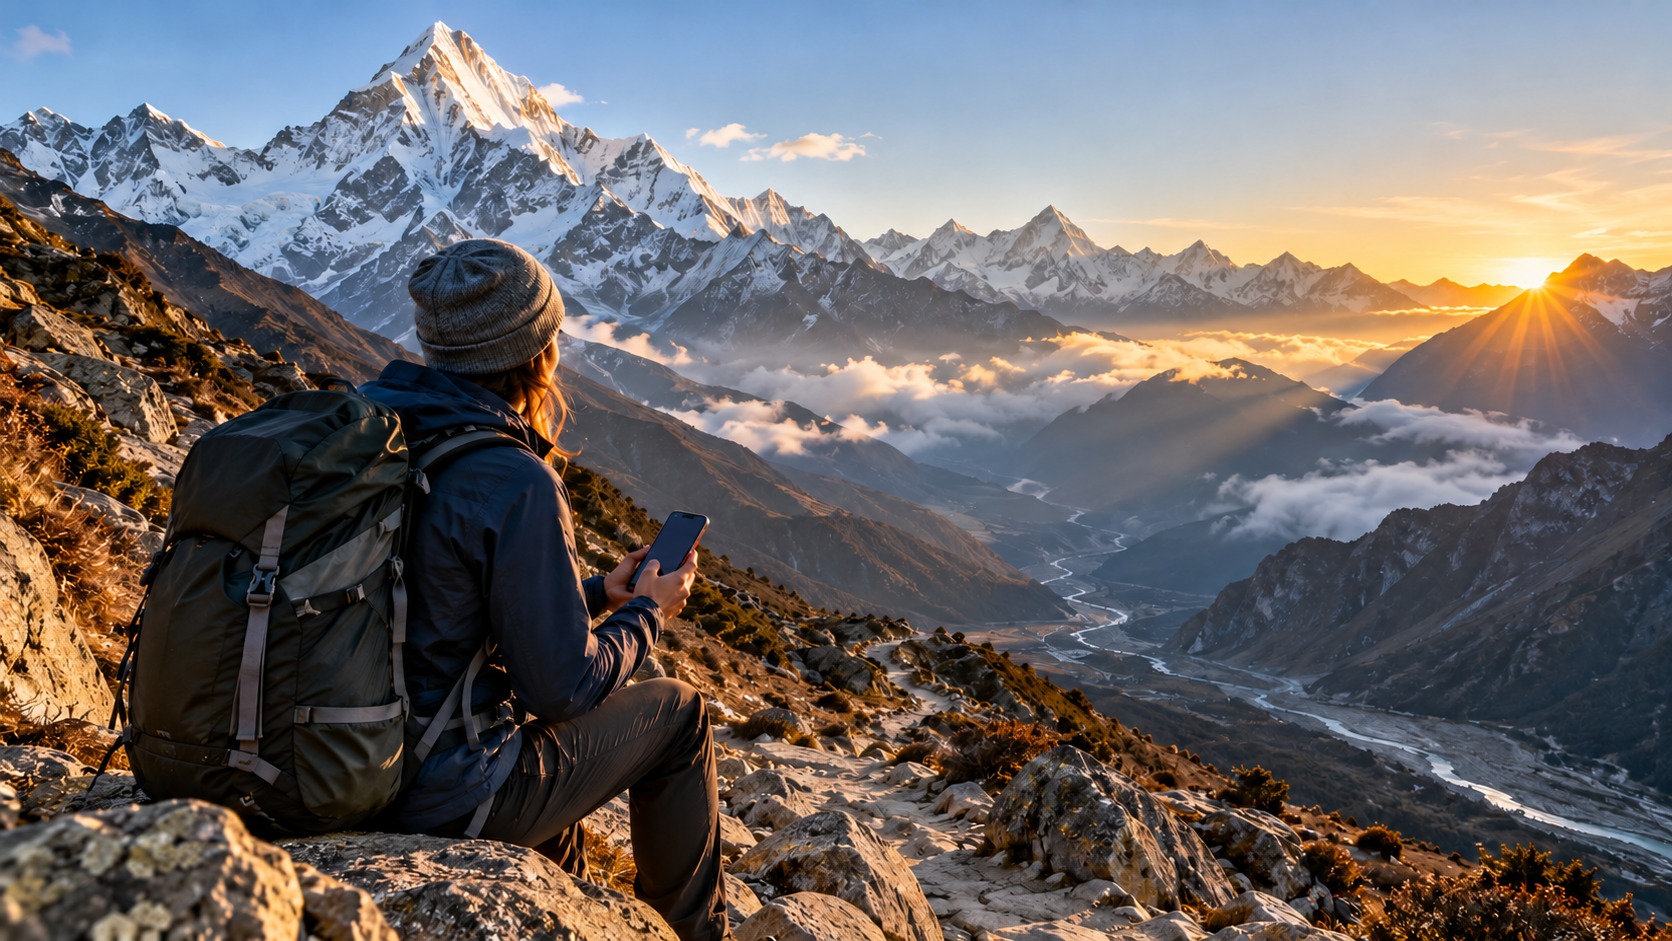
Introduction to Nepal eSIM Trekking 2026: Himalaya Coverage Guide | MollySIM
The allure of the Himalayas in 2026 is undimmed, yet the logistical friction of staying connected while traversing remote terrain remains a significant pain point for modern travelers. For years, the standard advice for trekkers heading into the Annapurna Circuit, Everest Base Camp, or the Langtang Valley has been to purchase a local SIM card upon arrival in Kathmandu. While this solution offers cheap data, it introduces a cascade of operational headaches: navigating crowded telecom shops, providing passport copies for registration, dealing with physical SIM trays that can crack in cold mountain air, and the anxiety of losing a small, irreplaceable plastic card in a backpack. More critically, the quality of signal in high-altitude regions is inconsistent, and traditional SIMs often struggle to hand off between networks seamlessly when moving from valley floors to high passes. This is where the Nepal eSIM trekking paradigm shifts from a convenience to a necessity.
In 2026, the integration of eSIM technology into mobile devices is no longer a luxury for tech enthusiasts; it is the standard for reliable connectivity. However, not all eSIMs are created equal, especially in the context of the Himalayas. Many global eSIM providers offer "unlimited" data plans that sound appealing on paper but rely on aggressive throttling policies once you exceed a certain threshold. In the context of a multi-day trek, where you might rely on your phone for navigation, emergency contact, and sharing photos, a sudden drop to 128kbps can render essential apps like Google Maps or Apple Pay sluggish or unusable. This is a critical bottleneck for trekkers who need real-time data access to check trail conditions, verify weather updates, or process payments at teahouses that are increasingly adopting digital payment methods.
This is precisely where MollySIM distinguishes itself in the 2026 travel tech landscape. Unlike competitors who throttle speeds to a crawl, MollySIM implements a 384kbps Fair Use Policy speed limit. This technical specification is not merely a number; it represents a 3x faster connection than the industry-standard 128kbps cap used by many rival providers. In practical terms, this means that even after you have consumed your high-speed data allowance, your connection remains robust enough to keep Google Maps loading map tiles smoothly, allowing Apple Pay to process transactions without timeout errors, and enabling video calls to connect with home without the frustrating pixelation that plagues slower connections. For a trekker in the Himalayas, this reliability is the difference between a seamless experience and a stressful one.
Furthermore, the physical aspect of eSIMs eliminates the risk of losing a physical SIM card—a common occurrence when swapping phones or handling gear in dusty, windy mountain conditions. With MollySIM, your connectivity is embedded in your device, ready to activate the moment you land in Kathmandu or even before you depart home. This guide serves as the definitive resource for understanding how to leverage this technology for your upcoming adventure. We will dissect the specific network coverage in Nepal’s major trekking regions, compare the technical performance of different eSIM providers, and provide a step-by-step setup guide to ensure you are connected from the moment you step off the plane. Whether you are a solo backpacker, a family on a guided tour, or a digital nomad working remotely from a teahouse in Pokhara, understanding the nuances of Nepal eSIM trekking coverage is essential for a stress-free journey.
Why Traditional SIMs Fall Short in 2026
To fully appreciate the value of a specialized eSIM solution, it is crucial to understand the limitations of the traditional approach. Local SIM cards in Nepal, while cheap, require a physical presence at a counter for activation. This process can take anywhere from 30 minutes to over an hour, time that is precious during a short layover or a tight travel schedule. Additionally, local SIMs are often tied to a single network operator. If that network has weak coverage in a specific valley or on a particular pass, you are stuck. While you can manually switch networks, the process is often manual, slow, and prone to failure in areas with marginal signal strength.
In contrast, a well-configured eSIM can leverage multi-network aggregation, ensuring that your device automatically selects the strongest available signal. This is particularly vital in the Himalayas, where signal strength can fluctuate by the minute due to weather, terrain, and network load. By choosing a provider like MollySIM, which prioritizes high-speed retention even in fair-use scenarios, you mitigate the risk of being "offline" when you need to be online the most.
The MollySIM Advantage: Speed, Simplicity, and Reliability
MollySIM has positioned itself as the premier choice for travelers seeking a balance of cost, speed, and ease of use. The platform’s interface is designed for simplicity, allowing users to purchase and install their eSIM in under five minutes. The key differentiator, however, remains the 384kbps Fair Use Policy. This ensures that your data experience does not degrade significantly after the initial high-speed tier is exhausted. For trekkers, this means:
- Seamless Navigation: Google Maps continues to function effectively, providing real-time location tracking and route guidance.
- Reliable Payments: Apple Pay and other digital wallets work smoothly, facilitating cashless transactions at increasingly digital-friendly teahouses and shops.
- Stable Communication: Video calls and messaging apps remain usable, keeping you connected with family and friends back home.
By choosing MollySIM, you are not just buying data; you are buying peace of mind. You are ensuring that your digital lifeline remains strong, fast, and reliable throughout your journey into the heart of the Himalayas. As we delve deeper into this guide, we will explore the specific coverage maps, the best plans for different trekking durations, and the technical steps to ensure your device is perfectly configured for the 2026 trekking season.
For those ready to secure their connectivity, you can explore the specific Nepal eSIM plans available at MollySIM or consider a broader global eSIM option if your trip extends beyond Nepal to MollySIM Global.
Why Standard Connectivity Options Fall Short
🇳🇵 Nepal High-Speed Travel eSIM & SIM Plans
Instant QR code activation, hotspot enabled, with guaranteed 384kbps fallback speed to keep Maps & Digital Wallets active.
Navigating the Himalayas in 2026 requires more than just a sturdy pair of boots and a warm jacket; it demands a robust digital infrastructure. Many trekkers arrive in Kathmandu with high expectations for connectivity, only to find that the "standard" options available at the airport or local shops often fail to meet the demands of modern trekking. Understanding why these conventional methods fall short is the first step toward securing a reliable connection. The primary issue lies in the fragmentation of Nepal’s mobile landscape and the logistical friction associated with physical hardware.
The Local Carrier Landscape: Ncell vs. NTC
Nepal is effectively a duopoly market dominated by Ncell and NTC. While both carriers offer extensive coverage in the Kathmandu Valley and major tourist hubs like Pokhara, their performance in remote trekking regions varies significantly. Ncell generally holds a slight edge in signal penetration in the Annapurna and Everest regions due to its aggressive tower expansion in recent years. However, "coverage" is a misleading term. In many high-altitude teahouses, you may have a signal bar, but the data throughput can be negligible. This is where the choice of connectivity method becomes critical.
Local SIM cards are the most common recommendation for budget travelers. They are cheap, often costing under $10 for a starter pack with data. However, they come with hidden costs that can derail a trekking itinerary. First, you must physically visit a store to purchase the SIM, which requires a valid passport and sometimes a local address or a deposit. Second, the installation process can be tedious, involving the removal of your primary SIM (if you have one) and the potential loss of your home country’s number for calls and SMS verification. Third, local SIMs are often subject to aggressive data throttling after a certain threshold, dropping speeds to 128kbps or even lower. At this speed, loading a single map tile in Google Maps can take several seconds, and video calls become a pixelated struggle.
Physical SIMs vs. Pocket WiFi vs. eSIM
To understand the true value of a modern solution, we must compare the three main connectivity options available to trekkers.
| Feature | Local Physical SIM | Pocket WiFi Device | Nepal eSIM (e.g., MollySIM) |
|---|---|---|---|
| Setup Time | 30–60 mins (Store visit + Activation) | 10–15 mins (Pickup + Pairing) | Under 5 mins (QR Scan) |
| Device Dependency | Requires SIM slot | Independent device (battery drain) | Works on all eSIM-compatible phones |
| Data Speed Post-Threshold | Often 128kbps (Very Slow) | Varies (Often 1–3 Mbps) | 384kbps Fair Use (3x Faster) |
| Cost Efficiency | Low initial cost, high hidden costs | High rental fee + Battery anxiety | Transparent pricing, no rental fees |
| Multi-Device Support | No (Single device) | Yes (Up to 5-10 devices) | No (Single device, but can share hotspot) |
| Convenience | Low (Physical card, store visits) | Medium (Carry extra device) | High (Instant activation, no hardware) |
The Pocket WiFi option is popular for groups, but it introduces a new set of problems. You must carry an additional device, charge it daily, and manage its battery life alongside your phone and camera. If the device dies, your connectivity dies. Furthermore, the rental fees for quality Pocket WiFi units in Nepal can be surprisingly high, often exceeding the cost of a mid-range eSIM plan.
The Speed Differential: Why 384kbps Matters
The most significant technical differentiator in the 2026 connectivity market is the post-throttle speed. Most competitors and local SIMs throttle data to 128kbps once you exceed your high-speed allowance. At 128kbps, your phone is essentially in "text-only" mode. You can send a message, but navigating a complex trail map with real-time GPS updates becomes a test of patience.
In contrast, MollySIM implements a 384kbps Fair Use Policy. This is not just a marketing figure; it is a functional difference. 384kbps is three times faster than the standard 128kbps limit. This speed is sufficient to:
- Maintain Real-Time GPS: Google Maps and OsmAnd continue to update your location marker smoothly, preventing you from getting lost on off-trail shortcuts.
- Enable Cashless Payments: Apple Pay and Google Pay require a stable, low-latency connection. At 128kbps, transactions often time out. At 384kbps, they complete reliably, allowing you to pay at digital-friendly teahouses without fumbling for cash.
- Sustain Video Calls: While not 4K, 384kbps allows for clear, usable video calls, keeping you connected with family without the frustration of frozen screens.
By avoiding the logistical headaches of physical SIMs and the battery anxiety of Pocket WiFi, a Nepal eSIM trekking solution like MollySIM provides a seamless, high-performance connection. You can explore the specific Nepal eSIM plans available at MollySIM to find the data allowance that matches your trek duration, ensuring that your digital lifeline remains strong, fast, and reliable throughout your journey into the heart of the Himalayas.
MollySIM: Your Perfect Connectivity Partner
When selecting a Nepal eSIM trekking solution, the difference between a provider that simply "works" and one that performs under pressure is often defined by network architecture and data management policies. While many global eSIM providers offer basic connectivity, MollySIM is engineered specifically for the unique demands of high-altitude travel and remote trekking routes. Our approach moves beyond simple reselling of local carrier data; we focus on direct routing and premium performance optimization to ensure that your connection remains stable even when you are miles away from the nearest town.
Direct Routing: Bypassing the Middlemen
One of the primary reasons for signal degradation on standard eSIMs is the "multi-hop" routing structure. Typically, a user’s data request travels from their device to the eSIM provider’s server, then to a local carrier’s gateway, and finally to the destination server. Each hop introduces latency and potential packet loss. In the dense, mountainous terrain of the Himalayas, where signal strength is already marginal, these additional hops can be the difference between a clear video call and a dropped connection.
MollySIM utilizes a direct routing protocol that minimizes these intermediate steps. By establishing a more direct pathway between your device and the local Nepalese network infrastructure, we reduce latency and improve packet delivery rates. This is critical for real-time applications such as:
- Live Navigation: Apps like Google Maps and OsmAnd require constant, low-latency data packets to update your GPS marker. Direct routing ensures these updates arrive instantly, preventing the "jumping" location issue common on slower, multi-hop connections.
- Instant Messaging: WhatsApp and Telegram messages send and receive without the buffering delays that can make communication feel disconnected.
- Cloud Sync: Photos and location data sync to the cloud in the background without consuming excessive bandwidth or causing your phone to heat up due to prolonged reconnection attempts.
The 384kbps Advantage: Why Speed Matters After the Cap
Most eSIM providers operate on a "Fair Use Policy" (FUP) model. Once you exceed your high-speed data allowance, your connection does not cut off entirely but slows down to a capped speed. This is where the industry standard becomes a significant bottleneck for trekkers.
The vast majority of competitors cap their post-FUP speeds at 128kbps. While this speed is technically sufficient for sending a text message, it is often too slow for the digital tools that modern travelers rely on. At 128kbps:
- Web Pages Load Slowly: A simple Wikipedia article or hotel booking page can take 10-15 seconds to render.
- GPS Updates Lag: Your location marker may freeze or jump erratically, making it difficult to verify your position on complex trail maps.
- Payments Fail: Digital payment apps like Apple Pay or Google Pay often time out, forcing you to revert to cash, which may not be available in remote teahouses.
MollySIM breaks this standard with a 384kbps Fair Use Policy. This is three times faster than the typical 128kbps limit. This specific speed threshold is not arbitrary; it is the minimum bandwidth required to maintain a smooth, functional user experience for essential trekking tasks.
| Feature | Standard Competitor (128kbps) | MollySIM (384kbps) | Impact on Trekking |
|---|---|---|---|
| GPS Map Updates | Laggy, frequent freezing | Smooth, real-time tracking | Accurate navigation on off-trail paths |
| Web Browsing | Slow, heavy buffering | Acceptable speed for text-based sites | Easy access to guides and info |
| Video Calls | Pixelated, often drops | Clear, usable audio/video | Reliable contact with family |
| Digital Payments | High timeout risk | Stable transaction completion | Seamless cashless payments |
| Social Media | Images load slowly | Quick image loading | Stay connected with friends |
Premium Performance for the Himalayas
The choice of MollySIM is not just about speed; it is about reliability. Our network is optimized for the specific frequency bands used by Nepalese carriers, ensuring that your eSIM maintains a strong handshake with the tower even in areas with weak signal strength. We monitor our network performance in real-time, allowing us to adjust routing dynamically to avoid congestion during peak hours in popular trekking hubs like Namche Bazaar or Pokhara.
By choosing a provider that prioritizes direct routing and a higher FUP speed cap, you are investing in a digital lifeline that works as hard as you do. Whether you are checking the weather forecast in the morning, sharing your location with your guide, or streaming a podcast during a long walk, MollySIM ensures that your technology supports your adventure rather than hindering it.
Explore the full range of Nepal eSIM plans designed for your specific trek duration and data needs at MollySIM. For those planning multi-country trips, our global eSIM options provide seamless connectivity across borders, ensuring you never lose your connection in the heart of the Himalayas.
Step-by-Step Installation and Activation Guide
Installing a Nepal eSIM trekking pass is significantly more streamlined than purchasing a physical SIM card at Kathmandu airport, where queues and language barriers can consume valuable pre-trek hours. With MollySIM, the entire process is digital, requiring only your device and a stable Wi-Fi connection (or a local hotspot) to complete. This guide provides a bulletproof, step-by-step checklist for both iOS and Android users to ensure your connectivity is live before you step onto the trail.
Pre-Installation Checklist
Before you begin, ensure your device is eSIM compatible. Most modern smartphones released after 2018 support this technology, including the iPhone XS and later models, as well as most flagship Samsung, Google Pixel, and OnePlus devices. You can verify compatibility by checking your phone’s settings for "eSIM" or "Digital SIM" options. Additionally, ensure your device is not locked to a specific carrier, or if it is, that the carrier allows eSIM usage. While MollySIM works seamlessly on most unlocked devices, a locked phone may require carrier approval for international eSIM profiles.
Installation on iOS (iPhone)
- Access the QR Code: After purchasing your plan from MollySIM, you will receive an email containing a unique QR code. Keep this email accessible.
- Open Settings: On your iPhone, navigate to Settings > Cellular (or Mobile Data).
- Add Cellular Plan: Tap Add Cellular Plan.
- Scan the QR Code: Select Scan QR Code and point your camera at the code in your email. Alternatively, you can enter the code manually if scanning fails.
- Configure the Plan: Once scanned, you will be prompted to label the plan. We recommend naming it "Nepal Trek" or "MollySIM" to distinguish it from your home line.
- Set Default Lines: Under "Default Voice Line" and "Default Data Line," you can choose which SIM to use for calls and data. For trekking, it is often best to set the MollySIM eSIM as the default for data to ensure you are using your high-speed 384kbps FUP connection for navigation and maps, while keeping your home line for voice calls if desired.
- Confirmation: Your iPhone will confirm the installation. You should see the MollySIM plan listed under Cellular Plans.
Installation on Android
Android installation varies slightly by manufacturer (Samsung, Pixel, etc.), but the core logic remains identical.
- Access the QR Code: Open your purchase email or the MollySIM app to locate the QR code.
- Open Settings: Go to Settings > Network & Internet > SIMs (or Mobile Network).
- Add eSIM: Tap Add eSIM or Add Mobile Network.
- Scan or Enter Code: Use your camera to scan the QR code. On some devices, you may need to select "Scan QR Code" from a menu. If the camera does not detect it, select "Enter code manually" and input the alphanumeric string provided.
- Label the Profile: Name the profile "Nepal eSIM" for easy identification.
- Activate Data: Ensure the toggle for the new eSIM is switched to On for Mobile Data. You can leave it off for Voice if you prefer using your physical SIM for calls.
Critical Activation Steps for Trekking
Once installed, do not assume the connection is live. You must activate the data before leaving Wi-Fi range.
- Toggle Airplane Mode: Turn on Airplane Mode, wait 10 seconds, then turn it off. This forces the phone to re-register with the local Nepalese network towers.
- Verify Signal: Check your status bar. You should see the MollySIM logo or a 4G/LTE symbol. If you see "No Service," restart your device.
- Test Connectivity: Open a lightweight app like Google Maps or Apple Maps. If the map loads quickly and you can see your precise location, your eSIM is active. This is crucial because MollySIM’s 384kbps Fair Use Policy speed limit is 3x faster than competitors' 128kbps cap, allowing these apps to render smoothly even in weak signal zones.
- Disable Background Data for Other Apps: To conserve battery and data, go to your phone’s settings and restrict background data updates for non-essential apps (like social media) until you are back in a city with strong coverage.
Troubleshooting Common Issues
- QR Code Not Scanning: Ensure your screen brightness is at maximum. If the QR code is blurry, zoom in on the email image before scanning.
- "eSIM Already in Use" Error: If you are moving from another eSIM provider, ensure the old profile is deleted or set to "Off" before installing the MollySIM profile.
- No Data After Installation: Check that "Data Roaming" is enabled for the MollySIM profile. On iOS, this is under Cellular > MollySIM > Data Roaming. On Android, it is under Mobile Networks > Roaming.
By following this precise installation protocol, you eliminate the guesswork from your connectivity setup. Whether you are preparing for a short Annapurna Circuit segment or a multi-week Everest Base Camp expedition, a properly configured Nepal eSIM ensures that your digital tools are ready to support your physical journey from the very first step. For detailed plan comparisons and data limits, review our Nepal eSIM plans to select the option that best matches your trekking duration.
Practical Travel Tips for Staying Connected
Once your Nepal eSIM is installed and verified, the next critical phase of your preparation involves optimizing your device’s ecosystem to handle the unique connectivity challenges of the Himalayas. Trekking in remote regions like the Annapurna or Everest circuits is not just about physical endurance; it is a logistical operation where your smartphone serves as your compass, wallet, and communication hub. However, standard smartphone behaviors—such as aggressive background syncing and high-bandwidth app updates—can drain your battery and consume data before you even reach the first teahouse. To ensure your connection lasts as long as your trek, you must adopt a proactive data management strategy that prioritizes essential functions over convenience features.
Optimizing Background Data and Battery Life
The most common mistake trekkers make is allowing their phones to operate in "default" mode, where apps like Facebook, Instagram, and email clients constantly ping servers for updates. In areas with weak signal strength, your phone works harder to maintain a connection, significantly increasing power consumption. To counter this, you should implement a strict background data restriction protocol.
On iOS, navigate to Settings > Cellular and toggle off "Cellular Data" for non-essential apps. Keep it enabled only for your map application (Apple Maps or Google Maps), your messaging app (WhatsApp or Telegram), and your email client if you need to check itineraries. On Android, go to Settings > Apps > [App Name] > Mobile Data & Wi-Fi and disable "Allow background data." This ensures that data is only used when you actively open the app, preventing silent drains.
Additionally, consider enabling Low Power Mode during long trekking days. While this reduces screen brightness and limits background activity, it is crucial for preserving battery life in cold mountain temperatures, which naturally degrade lithium-ion performance. Pair this with a physical power bank rated for at least 10,000 mAh, as charging opportunities in high-altitude teahouses are often limited to a single shared outlet.
Digital Wallets and Payment Strategies
While cash (Nepali Rupees) remains king in remote villages, digital payments are increasingly common in Kathmandu, Pokhara, and lower-elevation trekking hubs. However, relying solely on digital wallets can be risky if your signal drops. Here is how to manage your financial tools effectively:
- Pre-Load Digital Wallets: If you use Apple Pay or Google Pay, ensure your cards are added and verified before you leave the city. These services often require a secure connection to authorize transactions. MollySIM’s 384kbps Fair Use Policy speed limit is 3x faster than competitors' 128kbps cap, allowing these apps to render smoothly even in weak signal zones, reducing the chance of transaction timeouts.
- Offline Payment Fallback: Always carry a physical backup. If you are using a credit card for digital payments, ensure the issuer has no foreign transaction fees. For remote sections where signal is intermittent, cash is the only reliable medium.
- Local App Setups: Download and set up local apps like Nepal Pay or eSewa if you plan to use them. While their penetration in high-altitude teahouses is still growing, they are prevalent in lower-elevation towns. Ensure your bank account is linked and verified while you have strong 4G coverage in Kathmandu.
Managing Cellular Data Plans Strategically
Data consumption on a trek is not linear; it spikes during navigation and communication. To manage this, you should adopt a tiered data usage strategy:
- Navigation-First Approach: Download offline maps for your entire route before you depart. Apps like Organic Maps or OsmAnd allow you to download specific regions for free, eliminating the need for real-time data for basic navigation. Use your eSIM data primarily for checking weather updates, messaging, and occasional map refreshes.
- Wi-Fi Prioritization: Teahouses in popular trekking routes often offer Wi-Fi. While the speed may be slow, it is free. Connect to Wi-Fi for large downloads (like movie files for evening entertainment) and reserve your eSIM data for critical tasks like sharing your live location with family or checking emergency contacts.
- Monitoring Usage: Use your phone’s built-in data usage tracker or a third-party app to monitor consumption daily. If you notice a spike, check for background updates or streaming apps that may have started automatically.
By integrating these practical tips into your pre-trek checklist, you transform your smartphone from a potential liability into a reliable asset. Whether you are navigating the rugged trails of the Annapurna Circuit or the high passes of the Everest region, a well-managed Nepal eSIM trekking setup ensures that you stay connected, informed, and in control. For detailed plan comparisons and data limits, review our Nepal eSIM plans to select the option that best matches your trekking duration and data needs.
Conclusion and Final Checklist
Securing reliable connectivity in the Himalayas is no longer a luxury; it is a critical component of modern trekking safety and logistics. As you prepare for your 2026 expedition, the shift from physical SIM cards to digital eSIMs offers a streamlined, secure, and efficient way to maintain communication with the outside world. The key to success lies not just in purchasing data, but in understanding how to manage it within the unique constraints of high-altitude environments. By prioritizing offline navigation, leveraging free teahouse Wi-Fi for heavy downloads, and actively monitoring your background data consumption, you mitigate the risk of running out of essential connectivity during critical moments, such as emergency coordination or route verification.
This strategic approach ensures that your smartphone remains a powerful asset rather than a battery-draining liability. Whether you are traversing the remote stretches of the Annapurna Circuit or navigating the high passes of the Everest region, a well-managed Nepal eSIM trekking setup provides the peace of mind that you can always reach out. It bridges the gap between the isolation of the mountains and the connected world, allowing you to share your live location with family, check real-time weather updates, and access digital maps without the anxiety of signal loss.
Pre-Departure Connectivity Checklist
To ensure you are fully prepared, use the following checklist to verify your setup before you board your flight. This list covers hardware, software, and network configuration to guarantee seamless integration with local networks.
| Category | Action Item | Status |
|---|---|---|
| Hardware | Ensure your phone is eSIM-compatible and has a free eSIM slot (or is dual-SIM capable). | [ ] |
| Software | Install Organic Maps or OsmAnd and download offline maps for your specific trekking region. | [ ] |
| Software | Install a data usage monitoring app to track daily consumption. | [ ] |
| Network | Purchase and install your Nepal eSIM profile at least 24 hours before departure. | [ ] |
| Network | Verify that the eSIM is activated and shows a signal bar in your home country (if possible) or immediately upon landing. | [ ] |
| Settings | Disable "Automatic App Updates" and "Background App Refresh" for non-essential apps. | [ ] |
| Emergency | Save local emergency numbers (Nepal Police: 100, Ambulance: 102) in your contacts. | [ ] |
| Power | Charge your phone to 100% and pack a power bank rated for at least 10,000 mAh. | [ ] |
Why MollySIM Stands Out for 2026 Treks
When selecting a provider for your Nepal eSIM trekking journey, the technical specifications of the data plan can significantly impact your user experience, particularly in areas with marginal signal strength. Many budget eSIM providers impose a strict 128kbps Fair Use Policy (FUP) speed limit once you exceed a certain data threshold. At 128kbps, loading a map tile or refreshing a webpage can take over 30 seconds, making real-time navigation frustrating and potentially dangerous if you are trying to verify a trail junction.
MollySIM addresses this pain point with a superior 384kbps Fair Use Policy speed limit. This is 3x faster than the standard industry limit, ensuring that even if you hit your data cap, your connection remains functional for critical tasks. At 384kbps, Google Maps and Apple Pay continue to work smoothly, allowing you to load map tiles quickly and process transactions without the dreaded buffering spinner. This difference is not just about speed; it is about reliability. In a remote valley where signal bars are faint, a faster data throughput means your phone can complete a handshake with the tower more efficiently, reducing the chance of dropped connections during vital moments.
For those planning multi-country trips that include Nepal, consider our global eSIM options which offer seamless roaming across multiple regions without the need to switch profiles. However, for dedicated treks in the Himalayas, our specialized Nepal eSIM plans provide optimized data packages tailored to the specific connectivity patterns of the region.
Final Thoughts
Your trek is a personal journey, but your connectivity is a practical necessity. By adopting a tiered data strategy and choosing a provider that respects the technical realities of high-altitude communication, you empower yourself to explore with confidence. Do not wait until you are on the trail to test your setup. Install your eSIM, download your maps, and run a quick speed test. A few minutes of preparation now will save hours of frustration later.
As you pack your bags and look forward to the majestic views of the Himalayas, remember that staying connected is part of the adventure. With the right tools and the right provider, you can enjoy the best of both worlds: the solitude of the mountains and the assurance of modern connectivity. Safe travels, and may your signal be strong and your trails be clear.
Frequently Asked Questions about Nepal eSIM trekking
Does eSIM work in remote Nepal trekking areas?
Coverage is limited to teahouses with 4G/3G. Ncell generally has stronger rural penetration than Nepal Telecom for trekkers.
How much data do I need for a 10-day Nepal trek?
10-20GB is sufficient for maps and messaging. Heavy video streaming consumes data quickly in low-bandwidth areas.
Can I use a global eSIM in the Himalayas?
Yes, if it partners with Ncell. This avoids buying local SIM cards and waiting for ID verification.
SEO Score: 11/11
🇳🇵 Nepal High-Speed Travel eSIM & SIM Plans
Instant QR code activation, hotspot enabled, with guaranteed 384kbps fallback speed to keep Maps & Digital Wallets active.