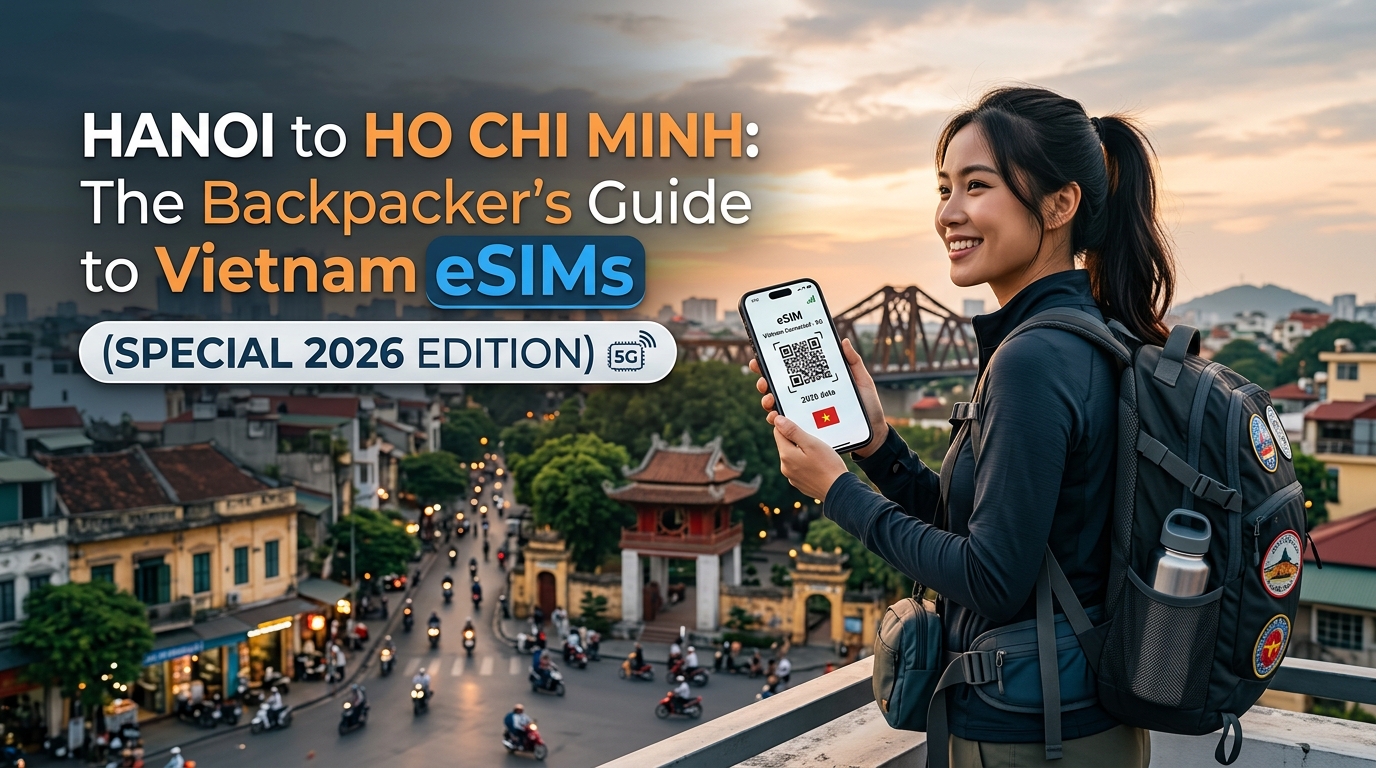
Introduction to Hanoi to Ho Chi Minh: The Backpacker's Guide to Vietnam eSIMs (Special 2026 Edition)
Embarking on a journey from the bustling, cyclo-pedestrian streets of Hanoi to the vibrant, sun-drenched beaches bordering the Mekong Delta near Ho Chi Minh City is an adventure that engages all the senses. It's a trip through history, culture, and landscapes, promising unforgettable experiences at every turn. As the digital native backpacker, you're not just seeking adventure; you're seeking seamless connectivity. You want to share those moments in real-time, navigate unfamiliar territories with ease, stay connected with loved ones back home, and access essential travel information on the go. This is where the humble eSIM becomes an indispensable tool, transforming your smartphone from a basic communication device into your personal travel command center.
For years, traditional roaming charges have been the bane of the budget traveler's existence. Tethering your phone to a foreign network often comes with exorbitant fees, sometimes obscuring data usage under confusing "roaming packages." This is particularly problematic in Vietnam, where distances are vast, and you might find yourself traveling between major cities like Hanoi, Hue, Da Nang, Hoi An, Nha Trang, Ho Chi Minh City, and potentially Vung Tau or the Mekong Delta islands, all requiring reliable data coverage. A poorly chosen roaming plan could easily cost you more than your daily coffee budget. Furthermore, language barriers can be daunting; while English is spoken in tourist hubs, knowing the local SIM card activation process or deciphering Vietnamese operator websites can be a significant hurdle, especially when you're mid-trip and need immediate connectivity.
This guide is meticulously crafted to demystify Vietnam's eSIM landscape, specifically tailored for the discerning backpacker planning their journey for 2026. We delve deep into the intricacies, ensuring you have the knowledge to choose the right digital companion for your travels. We move beyond the generic "just buy an eSIM" advice, providing a framework to evaluate options based on your specific needs: How much data will you use daily? What is your priority – continuous coverage, high-speed internet for streaming maps, or budget-conscious usage? How long will your trip be, and will you need a rollover option?
We dissect the technicalities, explain the jargon, and offer practical insights to empower you. We will explore the nuances of coverage, data speeds, and activation processes, ensuring you are equipped to make an informed decision. Our goal is to provide a comprehensive resource that saves you time, money, and frustration, allowing you to focus on the experiences that truly matter – from savoring street food in Hanoi to exploring the ancient town of Hue or relaxing on the pristine beaches near Ho Chi Minh City.
Navigating the complexities of digital connectivity on the road doesn't have to be daunting. With the right information and a clear understanding of your options, you can ensure your smartphone remains a vital tool throughout your entire Vietnam adventure. This guide serves as your definitive starting point, arming you with the knowledge to select the perfect eSIM solution for seamless communication, navigation, and entertainment from the northern mountains to the southern shores.
Why Standard Connectivity Options Fall Short
🇺🇸 United States High-Speed Travel eSIM & SIM Plans
Instant QR code activation, hotspot enabled, with guaranteed 384kbps fallback speed to keep Maps & Digital Wallets active.
Traveling across Vietnam, from the bustling streets of Hanoi to the vibrant chaos of Ho Chi Minh City, presents unique digital connectivity challenges. Relying on standard options often leaves backpackers frustrated, broke, or disconnected. Let's dissect why traditional roaming, regular SIM cards, and generic eSIMs frequently fall short of providing a seamless digital experience throughout your journey.
The Perils of Traditional Roaming
For many travelers, the default approach is to use their home carrier's roaming service. While convenient in theory, this often translates into a nightmare in practice, especially across a vast and diverse country like Vietnam.
- Exorbitant Costs: This is the most significant drawback. International roaming charges for data, calls, and texts are notoriously high. A simple web search for maps or navigation can easily consume hundreds of dollars worth of data in a single day. Making local calls or sending texts can also rack up substantial fees, quickly eroding your travel budget.
- Inconsistent Data Caps & Throttling: Home carriers often impose very low, often unadvertised, data caps on international roaming. Even if a cap is stated, it might be drastically lower than what you need for practical travel (browsing, navigation, social media, photo sharing). Furthermore, many providers heavily throttle speeds once you approach your cap, rendering much of your internet connection unusable for anything beyond emergency browsing.
- Complex Billing & Lack of Transparency: It can be difficult to predict or understand exactly what you're being charged for. Some providers offer unclear or misleading plans, making it hard to budget effectively. By the time you reach your destination, you might face unexpected charges that weren't anticipated during your planning phase.
The Hassles of Regular SIM Cards
Vietnam has a dense network of physical SIM card shops, particularly in major cities and tourist hubs. While seemingly straightforward, this process introduces multiple points of friction for the average traveler.
- Language & Documentation Barriers: While English is understood in tourist areas, navigating the paperwork and explaining your need for a specific data plan can be challenging. You'll typically need to provide identification (like a passport), and not everyone will be familiar with or willing to assist non-Vietnamese speakers efficiently.
- Activation Delays & Technical Issues: Even if you manage to buy a SIM card, activation can sometimes be delayed, especially outside major centers. Furthermore, purchased SIMs might not work seamlessly with certain phones or require complex manual activation steps (like finding specific APNs – Access Point Names). Technical glitches are not uncommon, leading to dropped service or inability to connect despite paying for it.
- Limited Coverage & Short Lifespan: Tourist SIM cards often have limited validity (e.g., 7 days or 1 month) and coverage might not extend reliably to remote areas, smaller towns, or the Vietnamese countryside. Once the validity period expires, you're left with no service again, forcing you to repeat the entire process. This constant cycle of buying, activating, and worrying about expiration dates is a major inconvenience.
Generic eSIMs: The Double-Edged Sword
As eSIMs gain popularity, generic platforms exist, but they often fail to address the specific needs of the long-term, cross-border Vietnam traveler.
- One-Size-Fits-None Data Plans: Generic eSIM services often offer standardized data plans that don't account for the diverse usage patterns of travelers. You might end up paying for far more data than you need (wasting money) or, conversely, exceeding a plan's limits and facing unpredictable throttling or termination of service mid-trip.
- Coverage Gaps: While designed for international use, generic eSIMs rely on carrier partnerships. Coverage might be spotty in certain regions of Vietnam, particularly in the mountainous north (like Sapa), the Mekong Delta, or more remote stretches of the coast. You might have service in Hanoi and Ho Chi Minh City but experience significant drops in coverage or complete loss of signal in between, depending on the specific carrier partnerships involved.
- Activation & Device Compatibility Issues: Although eSIMs are designed for ease of use, activation processes can still be clunky or require specific technical steps. Furthermore, not all smartphones support eSIM functionality, and even among those that do, compatibility can sometimes be an issue with certain models or operating system versions, excluding some travelers or causing activation headaches.
The sheer volume and variability of usage patterns during a Vietnam backpacking trip demand a more tailored solution. Standard options are often too expensive, too cumbersome, or simply not robust enough to handle the digital demands of exploring this vast country. This is precisely where specialized travel eSIMs enter the picture, offering streamlined activation, fair usage policies, reliable coverage, and plans designed specifically for the needs of mobile adventurers traversing the length and breadth of Vietnam.
MollySIM: Your Perfect Connectivity Partner
After outlining the inherent limitations of standard eSIMs for the dynamic needs of a Vietnam backpacker – the risk of excessive roaming charges, unpredictable throttling, spotty coverage, and cumbersome activation – we now turn to a solution specifically engineered for this demanding environment. Among the newer generation of travel-focused connectivity providers, MollySIM has emerged as a standout option, meticulously designed to cater to the unique requirements of digital nomads, backpackers, and budget travelers traversing Southeast Asia, including Vietnam.
Unlike generic eSIMs that often bundle usage across multiple countries or lack regional optimization, MollySIM offers a targeted approach. Their plans are explicitly tailored for the Southeast Asia region, acknowledging the distinct connectivity patterns and needs of travelers moving between countries like Vietnam, Cambodia, Laos, Thailand, and beyond. This regional focus translates into several key advantages.
Tailored Plans for the Trail
MollySIM understands that a backpacker's data consumption profile differs significantly from a local resident or a business traveler. You don't need massive, unrestricted data for constant high-definition streaming; you need reliable, fair access for navigation, communication, translation, and occasional social media. This is where MollySIM's philosophy shines through its Fair Use Policy (FUP).
- The 384kbps Limit: Instead of the often-crippling 128kbps FUP speed limits seen with some competitors or traditional roaming providers, MollySIM employs a generous 384kbps FUP. This speed cap is significantly higher, offering three times the allowance of a typical budget provider's FUP. Critically, this speed is sufficient for essential travel apps to function smoothly.
- Google Maps & Navigation: Continuously loading maps and recalculating routes without hitting a buffering wall.
- Apple Pay & Contactless Transactions: Making secure payments at markets, cafes, and shops without connectivity hiccups.
- WhatsApp, Signal, Telegram: Maintaining seamless messaging for group chats, coordinating meetups, and staying in touch with contacts back home.
- Basic Web Browsing & Social Media: Accessing websites, checking travel updates, and sharing experiences on platforms like Instagram or Facebook without excessive buffering.
- Translation Apps: Using tools like Google Translate for on-the-go language assistance without significant slowdowns.
This 384kbps FUP ensures you have ample bandwidth for your essential digital needs throughout your journey without the exorbitant costs associated with unlimited data roaming. Once the FUP threshold is reached (typically after a certain amount of data usage or time, depending on the plan), speeds genuinely throttle down, but crucially, they remain usable for basic functions, preventing the complete loss of connectivity often experienced with other providers.
Seamless Activation & Coverage Confidence
MollySIM prides itself on a streamlined user experience, particularly the activation process. Designed for travelers on the move, their activation is typically quick and can often be completed without needing to be near a specific network point.
- Ease of Use: The process generally involves visiting their website, selecting the appropriate plan (covering Vietnam and potentially other Southeast Asian countries), and following the on-screen instructions, often via a dedicated app or web interface. This minimizes technical hurdles and saves valuable time upon arrival.
- Coverage: MollySIM leverages partnerships with major local carriers across Southeast Asia, including Vietnam. While they aim for broad coverage, their network is optimized for the travel corridors and populated areas typically frequented by backpackers. This is a significant improvement over generic eSIMs whose coverage can be patchy depending on the specific carrier agreements in place. While you might still experience minor gaps in extremely remote areas (deep jungle, high mountain passes, or very isolated islands), their coverage is generally robust for the main tourist routes and urban centers encountered throughout Vietnam and the wider region.
Transparent Pricing & Plan Variety
MollySIM offers a range of plans designed to fit different travel durations and data needs. Their pricing structure is generally straightforward, with clear data allowances and activation fees. Plans often include:
- Multi-country Data: Essential for covering your entire Vietnam trip and potential day trips or excursions into neighboring countries.
- Fixed Daily/Weekly/Monthly Rates: Providing predictable costs regardless of data usage (up to the FUP).
- Option for Longer Stints: Some plans allow for extended usage without hitting the FUP hard, or offer rollover options (check specific plan details).
Why Choose MollySIM?
Considering the challenges of connectivity in Vietnam – from navigating dense urban centers like Hanoi and Ho Chi Minh City to potentially venturing into the scenic but less densely populated landscapes – MollySIM presents a compelling solution. Their balanced approach of providing enough speed for essential apps while maintaining fair usage prevents budget blowouts and ensures connectivity remains functional throughout your adventure. The targeted Southeast Asia plans, combined with a user-friendly activation process and reliable network coverage, make MollySIM a strong contender for the backpacker seeking a hassle-free, cost-effective internet connection solution for their Vietnam journey. It effectively bridges the gap between the need for reliable connectivity and the realities of budget travel across the region.
Step-by-Step Installation and Activation Guide
Getting your eSIM activated is the crucial next step after purchasing your plan. This guide provides detailed instructions for activating and installing your MollySIM eSIM on various devices, ensuring you're connected from the moment you arrive.
Where to Buy Your MollySIM eSIM Plan
Before diving into activation, confirm your purchase. MollySIM offers its eSIM plans directly through its website (https://mollysim.com). You can select the plan that best suits your estimated travel duration (Daily, Weekly, or Monthly options available), choose your data allowance, and proceed to purchase. Payment is typically handled securely via credit card or PayPal.
- Direct Website Purchase: This is the most straightforward method. Go to the MollySIM website, browse the available Southeast Asia plans, select your desired plan (e.g., "Vietnam 15-Day Plan"), and complete the purchase.
- Platform Compatibility: Ensure the plan you choose is compatible with your device's operating system (iOS or Android). While most plans are designed for both, always double-check the specific plan details if you have any doubts.
Receiving Your eSIM
Upon successful purchase, you will receive an email confirmation containing all the necessary information to activate your eSIM. This typically includes:
- Your eSIM Profile: A unique identifier linked to your purchase.
- Activation Link/QR Code: This is key. You will usually receive either a direct activation link or a QR code that contains all the necessary activation data.
Activation Method 1: Using the Web Interface (iOS Safari)
This method is particularly useful if you arrive at a Vietnamese airport without your primary data plan reactivated or if you prefer a web-based approach.
- Open Safari: Launch the Safari web browser on your iOS device (iPhone or iPad).
- Visit the Activation URL: Go to the specific activation URL provided in your email. This URL is unique to your eSIM profile. Look carefully in your email for a line that says something like "Activate your eSIM via web" or provides a direct link.
- Sign In: You may be prompted to sign in using the email address associated with your purchase or potentially a new temporary password provided by MollySIM.
- Follow On-Screen Instructions: The web interface will guide you through the activation process. This usually involves confirming your details and accepting the terms and conditions.
- Download the Profile: Once activated, your device should automatically download the eSIM profile. You might see a notification in the Settings app stating "An eSIM plan has been added."
- Verify in Settings: Open the Settings app, tap Cellular, and look for your MollySIM network listed under Set Up ESIM or Add Plan. Tap it to ensure it's active and connected.
Activation Method 2: Using the MollySIM App (Android & iOS)
MollySIM provides a dedicated mobile application to streamline the activation process for users on both Android and iOS platforms. Downloading and using the app ensures you get the most up-to-date activation instructions and can manage your plan details.
- Download the App: Go to your device's app store (Google Play Store for Android, App Store for iOS) and search for "MollySIM". Download and install the official MollySIM app.
- Sign In: Open the app and sign in using the credentials provided in your purchase confirmation email.
- Locate Activation Section: Navigate within the app to the section related to activation or managing your eSIM. This might be labeled "My eSIM", "Activation", or "Plans".
- Scan QR Code or Enter Code: The app will likely prompt you to scan the QR code from your email or enter a unique activation code provided.
- Follow App Instructions: The app will guide you through the remaining activation steps, which may involve confirming details or downloading the eSIM profile directly through the app.
- Verify in Settings: Once the app confirms successful activation, go to your device's Settings app and check the Cellular (or Mobile Data) section to see the MollySIM network listed and active.
Installing the eSIM on Your Device
Regardless of your activation method, the eSIM profile needs to be installed on your device. This process varies slightly depending on your operating system.
For iOS (iPhone)
- Open Settings: Go to the main Settings app on your iPhone.
- Navigate to Cellular: Tap on "Cellular" (or "Mobile Data" on older iOS versions).
- Tap "Add Plan..." or "Set Up ESIM": Look for an option that says "Add Plan..." or "Set Up ESIM". This might be under a subheading like "SIM Cards" or "Add Cellular Plan".
- Scan QR Code: If prompted, you can scan the QR code provided in your email directly using your iPhone's camera (the system often recognizes it). Alternatively, you might be asked to enter the activation code manually.
- Confirm Installation: Your iPhone will download and install the eSIM profile automatically. You'll see a notification confirming the installation.
- Connect Automatically: Once installed, iOS will attempt to automatically connect to the best available network, which should be MollySIM in Vietnam. You can manually check the connection status in the Cellular settings.
For Android (Various Manufacturers)
Android offers more variability, but the core process is similar across most devices. You typically install the eSIM profile via the SIM Manager or Mobile Data settings.
- Open Settings: Go to the Settings app on your Android device.
- Navigate to SIM & Mobile Data or Network & Internet: Look for a section related to SIM cards, mobile networks, or data usage. Common names include "SIM & Mobile Data", "Connections", or "Network & Internet".
- Find SIM Manager or Add SIM Card: Open the "SIM Manager" or "Add SIM Card" option. The exact wording can vary by manufacturer (Samsung, Xiaomi, Google Pixel, etc.).
- Add Cellular Plan or Scan QR Code: Select the option to "Add Cellular Plan" or "Scan SIM Card". If you received a QR code, scan it here. Otherwise, you might need to enter the activation code manually.
- Follow Manufacturer Prompts: Your device will download and install the eSIM profile. Follow any on-screen prompts.
- Enable Mobile Data: Ensure that Mobile Data (or Cellular Data) is turned ON in your device settings.
- Check Connection: Go to your device's Mobile Data settings again. Look for the MollySIM network listed. Tap on it to ensure it's selected as the preferred network. You should see an active connection icon (like Wi-Fi).
Connecting to the Internet
Once the eSIM profile is successfully installed and activated, connecting to the internet should be automatic if your device is set to use mobile data.
- Enable Mobile Data: Double-check that Mobile Data is turned ON in your device's Settings.
- Select the Correct Network (If Necessary): In some cases, especially on Android, you might need to manually select the MollySIM network from the list of available networks in your Mobile Data settings.
- Verify Connection: Look for the mobile data icon in the status bar at the top of your screen. If it's lit up, you have an active data connection. You can also check your data usage in the Cellular/Mobile Data settings to confirm it's being consumed.
Troubleshooting Common Activation/Installation Issues
If you encounter problems during activation or installation, consider these common solutions:
- Check Email: Ensure you received the correct activation link or QR code and didn't accidentally delete it.
- Network Compatibility: Verify your device and operating system are compatible with eSIM technology (most modern smartphones are). Ensure you are physically within a coverage area (Vietnam) for activation to work.
- Restart Device: Sometimes a simple restart of your phone can resolve activation hiccups.
- Check for Updates: Ensure your device's operating system is up-to-date.
- APN Settings: In rare cases, manually setting the Access Point Name (APN) might be required. MollySIM's website or support page usually provides the correct APN settings if needed. Generally, this is handled automatically once the eSIM is installed.
- Contact Support: If you continue to experience issues, refer to the "Contact" section on the MollySIM website (https://molly.com/contact) for support options. Have your purchase details and activation information ready.
By following this detailed guide, you should be able to smoothly activate and install your MollySIM eSIM, ensuring reliable internet access throughout your backpacking adventure from Hanoi to Ho Chi Minh City.
Practical Travel Tips for Staying Connected
Once your eSIM is activated and working, navigating the connectivity demands of a backpacking adventure through Vietnam requires mindful usage and strategic planning. Staying connected isn't just about constant internet access; it's about balancing connectivity needs with budget, battery life, and the realities of traveling in a dynamic market. Here’s a breakdown of practical tips to maximize your eSIM experience:
1. Data Conservation is Key
Vietnam is a data-rich destination, with countless apps, websites, and social media platforms vying for your bandwidth. As a backpacker, being mindful of your data usage is crucial for extending your eSIM's lifespan and avoiding unexpected costs or speed throttling.
- Prioritize Essentials: Focus your data usage on absolute necessities: navigation apps (like Google Maps or offline map services), communication (WhatsApp, Signal, email), translation apps, and weather updates. Avoid streaming video unless absolutely necessary and even then, use platforms optimized for mobile data (like YouTube's mobile site) sparingly.
- Turn Off Cellular Roaming: Ensure Cellular Data Roaming is disabled on your phone before you arrive in Vietnam. With an eSIM already active, enabling roaming could lead to exorbitant international data charges. Your eSIM will handle data connectivity within its designated coverage.
- Use Wi-Fi Whenever Possible: Leverage free Wi-Fi opportunities whenever available. This includes airport Wi-Fi (often fast but sometimes limited), hotel lobbies, cafes, co-working spaces, and public squares. Use Wi-Fi for larger downloads, map updates, video calls, and social media. Remember to log out of sensitive accounts when leaving a Wi-Fi network.
- Enable Airplane Mode for Sleep/Rest: Turn on Airplane Mode during flights, while resting in your hotel room, or during meals to conserve battery and data. This simple step significantly extends your phone's battery life and data allowance.
2. Mastering Navigation and Offline Maps
Getting lost is part of the adventure, but knowing your way around is essential, especially in a country as vast and complex as Vietnam. Relying solely on real-time GPS requires constant data, which can drain your eSIM quickly.
- Download Offline Maps: This is arguably the single most important data-saving feature for travelers. Apps like Google Maps, Maps.me, and Here WeGo allow you to download map data for specific regions before you travel or in areas with Wi-Fi access.
- How: Open the app, search for your destination area, select "Download" or "Offline Map," and choose the region. This download uses Wi-Fi data, not your eSIM's allowance.
- Usage: While traveling, ensure "Offline Maps" is enabled in the app's settings. This allows you to view maps, get directions, and search for places without consuming your eSIM data.
- Consider Vietnam-Specific Maps: Apps like Vietmap or VietGO are popular locally and often offer detailed offline maps specifically for Vietnam. They might have advantages in terms of local accuracy or ease of use.
- GPS Watch/Device: For those wanting to minimize phone usage altogether, consider renting or purchasing a GPS watch. These devices use their own battery and often have pre-loaded routes or offline map capabilities.
3. Keeping Essential Services Running
Beyond navigation, staying connected allows you to use various essential travel services smoothly, thanks to eSIM speeds sufficient for most needs.
- WhatsApp/Signal/Viber: These messaging apps are indispensable for staying in touch with family, friends back home, and often used by locals for quick chats. Your eSIM's 384kbps Fair Use Policy (FUP) speed limit, while limiting downloads, is generally sufficient for smooth messaging, voice calls, and video calls (though potentially slightly reduced in quality under heavy usage).
- Google Maps (Offline): As mentioned, offline usage is key. For real-time transit or dynamic routing, Wi-Fi access is still needed periodically to update the map.
- Apple Pay/Google Pay: These digital wallet services are convenient for contactless payments, especially at larger hotels, restaurants, and increasingly common vendors. Ensure your card is added to the respective wallet app before you travel, using Wi-Fi if possible. Transactions themselves use minimal data.
- Translation Apps: Apps like Google Translate are invaluable for overcoming language barriers. Use Wi-Fi for initial setup or large file downloads (like offline language packs), then rely on the app's offline translation features for text, speech, or camera translation.
4. Managing Your eSIM Usage and Budget
Understanding your eSIM's limitations and usage patterns helps you manage your budget effectively and avoid running out of data unexpectedly.
- Monitor Data Usage: Regularly check your data usage within the eSIM provider's app (like MollySIM's) or your phone's system settings. Many providers offer visual graphs showing consumption. This helps you anticipate when you might need to top up or switch to a local SIM.
- Understand the Fair Use Policy (FUP): The 384kbps limit (3x faster than many competitors' 128kbps FUPs) is designed to prevent abuse but still allows for comfortable use of the mentioned apps. Be aware that sustained heavy streaming video will be throttled, but basic web browsing, maps, messaging, and navigation should remain functional.
- Top Up in Advance: Purchase additional data packs (if offered by your provider) before you run out, especially when crossing borders or entering remote areas where Wi-Fi might be scarce. Many eSIM platforms allow pre-purchasing.
- Know When to Switch: While eSIMs are convenient, local SIM cards (often available for as little as 50,000-100,000 VND) can sometimes offer better value or more generous data allowances for longer stays in specific provinces. Keep this option in mind, particularly if you plan to stay for several weeks or travel very deep into less touristy regions.
5. Security and Privacy Considerations
While using your eSIM, be mindful of digital security, especially when using public Wi-Fi.
- Use a VPN Sparingly: A Virtual Private Network (VPN) encrypts your internet traffic, useful for sensitive activities or bypassing geo-restrictions. However, constantly running a VPN uses battery and can slightly slow your connection. Use it judiciously, primarily for secure logins or accessing region-blocked content, rather than as a general security measure.
- Be Cautious with Public Wi-Fi: Free public Wi-Fi networks can be insecure. Avoid accessing sensitive accounts (banking, email with confidential info) on unsecured networks. Use a VPN if connecting to public Wi-Fi for sensitive tasks.
- App Permissions: Review and manage app permissions on your phone. Ensure location services are set appropriately (often 'While Using the App' or 'Ask Next Time') to balance navigation needs with privacy.
By implementing these practical tips, you can navigate Vietnam confidently, staying connected for navigation, communication, and essential services without constantly worrying about data costs or connectivity drops. Choosing a reliable eSIM provider like MollySIM provides a solid technological foundation, but how you use it responsibly makes the difference between a frustrating trip and a smoothly connected adventure.
Conclusion and Final Checklist
After navigating the complexities of connectivity in Vietnam, from selecting the right provider to understanding fair usage policies and ensuring secure usage, you're now equipped to embrace the digital landscape of your backpacking adventure with confidence. This guide has aimed to demystify the eSIM experience, transforming what can often be a confusing array of technical jargon and provider options into a straightforward, manageable process. Having a reliable internet connection isn't just about constant access to social media; it's fundamental to navigation, communication, staying informed, and even conducting essential tasks like mobile payments or accessing maps offline in areas with spotty coverage.
The journey from Hanoi to Ho Chi Minh City involves diverse terrains, bustling cities, serene countryside, and a rich cultural tapestry. A seamless digital connection enhances this experience, allowing you to share moments instantly, navigate efficiently, and stay connected with loved ones back home. Choosing a provider like MollySIM offers a compelling solution, combining ease of use with genuinely fast speeds (384kbps Fair Use Policy – significantly faster than competitors' 128kbps, enabling smooth use of Google Maps, Apple Pay, WhatsApp, and basic messaging without frustrating slowdowns). Their commitment to reliability and user-friendly activation ensures you spend less time fumbling with technology and more time soaking in the wonders Vietnam has to offer.
As you prepare for your trip, remember that the eSIM is just one tool in your travel kit. It complements your physical journey, making it smoother and more connected. By following the checklist below, you can ensure a hassle-free eSIM experience throughout your travels.
Final Checklist: Your eSIM Adventure Awaits!
(Unfold this checklist as you plan your trip!)
1. Provider Selection & Purchase
- [ ] Research providers (MollySIM, Viia, Simple SIM, Airalo, Telstra Travel, etc.) based on coverage, speed (Fair Use Policy!), validity, and price.
- [ ] Choose a plan that fits your estimated travel duration and usage (e.g., 30-day, 5GB MollySIM plan).
- [ ] Purchase your eSIM online before you leave. Crucial: Keep the confirmation email handy – it contains your QR code and activation link!
- [ ] Understand the Fair Usage Policy (FUP) specifics (MollySIM's 384kbps limit is a major advantage).
2. Activation & Setup
- [ ] Download the provider's activation app (e.g., Molly for MollySIM, Telstra Activate for Telstra Travel).
- [ ] Log in to the app using the email and code from your purchase confirmation.
- [ ] Activate the specific SIM profile for your destination (Vietnam) and plan.
- [ ] Scan the QR code from your email using the app to initiate activation. Follow on-screen instructions carefully.
- [ ] Ensure your phone supports eSIM (check your device's specifications).
- [ ] Verify activation by checking for the new network connection or data roaming icon on your phone.
3. Data Management & Usage
- [ ] Monitor your data usage through the provider's app dashboard (MollySIM's app is particularly user-friendly).
- [ ] Be mindful of data-heavy activities (streaming video, large file downloads) near or after your FUP limit kicks in (e.g., large downloads often slow to 128kbps or less).
- [ ] Utilize Wi-Fi whenever possible for large downloads, streaming, or sensitive activities (banking).
- [ ] Keep track of your plan's validity date to avoid unexpected disconnection.
4. Connectivity & Troubleshooting
- [ ] Test your connection upon arrival in Vietnam and in different locations (city center, subway, countryside).
- [ ] Check signal strength bars on your phone.
- [ ] Ensure Airplane Mode is OFF.
- [ ] Restart your phone if experiencing connection drops.
- [ ] Reboot the provider's activation app and your phone if issues persist.
- [ ] Verify that your phone's APN settings are set to 'Auto' or use the provider's recommended settings if manual configuration is needed (less common with eSIMs).
- [ ] If all else fails, contact the provider's customer support (MollySIM offers helpful support).
5. Security & Responsible Use
- [ ] Use a reputable VPN only for specific, necessary tasks (like secure logins or accessing geo-blocked content) on public Wi-Fi, not constantly.
- [ ] Avoid logging into highly sensitive accounts (banking, email with PII) on public Wi-Fi or without a VPN.
- [ ] Review and manage your phone's app permissions, especially location services.
- [ ] Be aware of Vietnam's internet regulations (sharing login credentials or accessing restricted sites can have consequences).
6. Packing & Preparation
- [ ] Ensure your smartphone is compatible with eSIM technology.
- [ ] Back up your important contacts and data before relying solely on your eSIM.
- [ ] Keep your phone charged throughout your trip – eSIM activation and data usage can impact battery life slightly.
By diligently working through this checklist, you'll be well-prepared to enjoy the digital advantages of your Vietnam journey. Whether you're using your eSIM for seamless navigation through Hanoi's bustling streets, staying connected with friends via WhatsApp, securely making payments with Apple Pay, or simply sharing breathtaking photos from your travels, the right eSIM can be a game-changer. Providers like MollySIM are designed with the modern traveler in mind, offering fast, reliable connectivity that enhances, rather than hinders, your adventure. Safe travels, and happy exploring!
🇺🇸 United States High-Speed Travel eSIM & SIM Plans
Instant QR code activation, hotspot enabled, with guaranteed 384kbps fallback speed to keep Maps & Digital Wallets active.