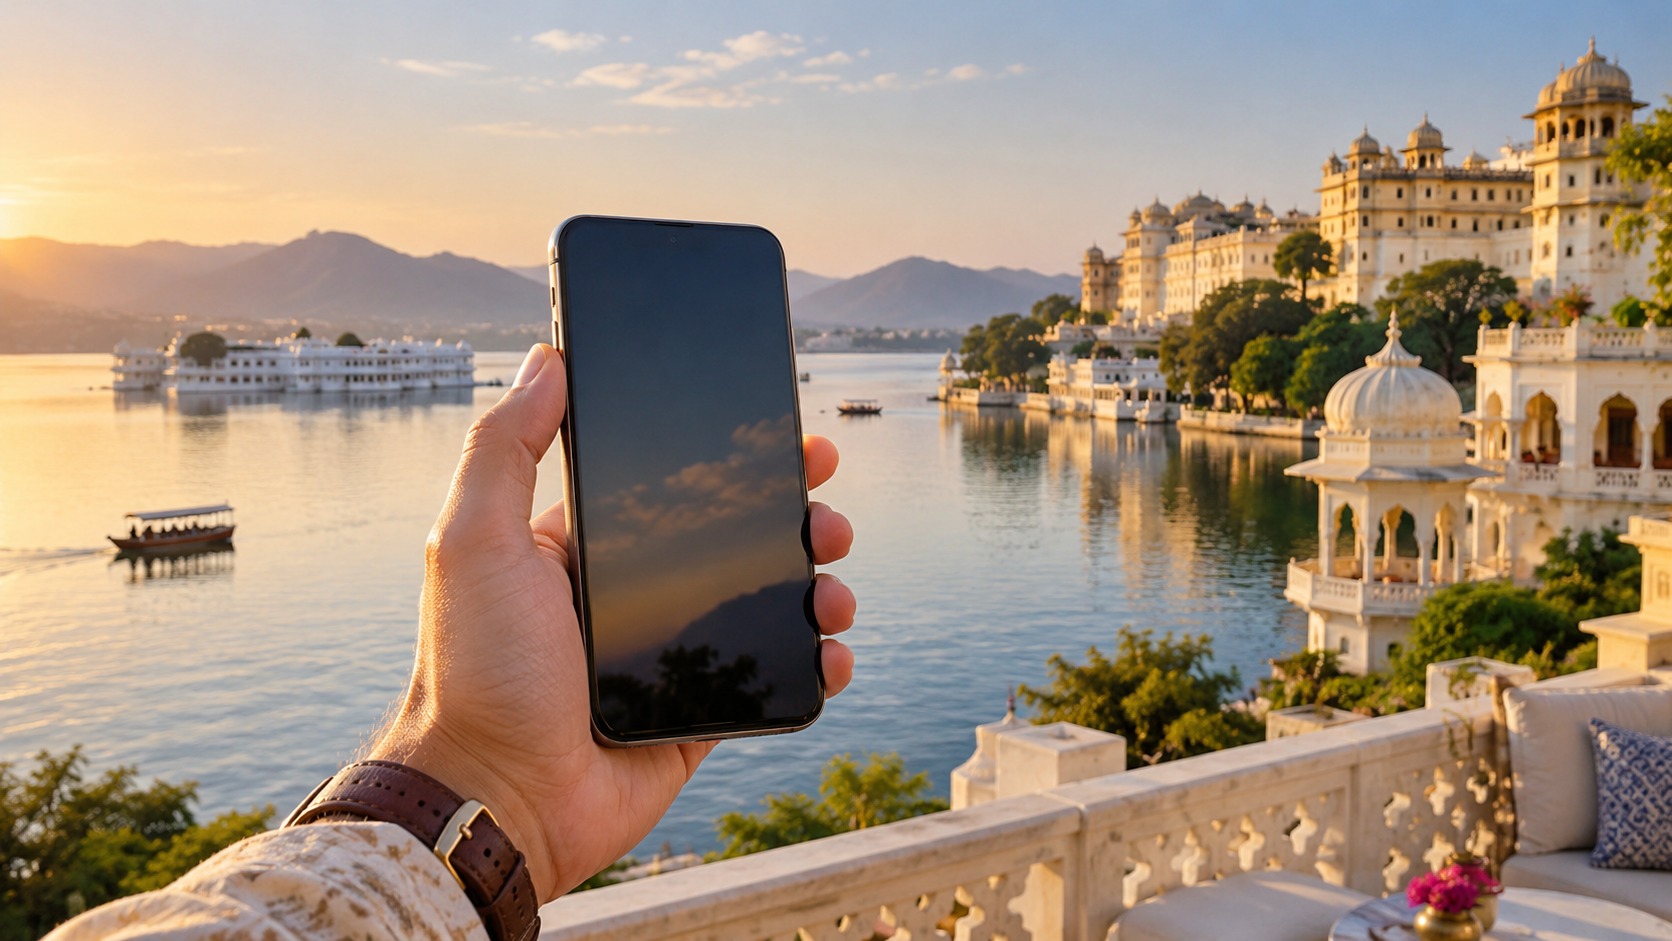
The 2026 Reality: Why India eSIM Activation Is No Longer a Gamble
India eSIM activation has historically been one of the most stressful technical hurdles for international travelers, a process fraught with bureaucratic friction, signal uncertainty, and the constant fear of being cut off from the digital world. For years, arriving in India meant surrendering your passport, enduring a biometric scan at a crowded counter, and hoping that the local shopkeeper understood your data needs. The traditional path required patience, a degree of Hindi or regional language proficiency, and a tolerance for the "wait and see" approach to connectivity. You would buy a physical SIM, insert it, and then spend the first 24 hours troubleshooting why your phone was stuck on "Searching for Network" or why your data speeds had plummeted to a crawl after the first gigabyte. This was the old way: a gamble where the outcome depended on the specific store, the specific operator’s regional infrastructure, and your own technical luck.
The landscape in 2026 is fundamentally different. The shift from physical SIMs to digital-first solutions has not just simplified the process; it has dismantled the primary pain points that made Indian mobile connectivity so intimidating. The core issue with traditional setups was never just the hardware—it was the configuration. Many travelers arrived with a freshly activated Jio or Airtel SIM, only to discover that their phone’s Access Point Name (APN) settings were incorrect, leading to a connection that technically existed but functionally failed. Worse still, without local knowledge, choosing between the two dominant carriers was a blind guess. Jio offers superior 5G coverage in rural and semi-urban areas, while Airtel often provides more stable 4G LTE in dense metropolitan cores. Guessing wrong could mean paying for premium data while experiencing sub-par speeds, a frustration that compounded the stress of navigating an unfamiliar city.
Furthermore, the risk of data throttling was a silent killer of the traditional tourist experience. Most local prepaid plans included a "Fair Use Policy" that kicked in after a certain threshold, often capping speeds at 128kbps. At this speed, loading a map, checking a translation app, or even sending a quick email became a tedious exercise in waiting. For modern travelers who rely on real-time navigation, digital payments, and instant communication, 128kbps is effectively a dead end. This is where the 2026 reality of India eSIM activation shines. Digital-first providers have moved beyond simple connectivity to offer optimized, pre-configured profiles that bypass the APN errors and signal hunting that plagued physical SIMs.
Enter MollySIM, a solution designed specifically to eliminate the bureaucratic headache and technical guesswork. Unlike the traditional market, where you are left to configure your device manually, MollySIM provides a streamlined India eSIM experience that is ready to use the moment you scan the QR code. The critical differentiator in 2026 is speed consistency. While many competitors still adhere to the industry-standard 128kbps throttling limit after data exhaustion, MollySIM implements a 384kbps Fair Use Policy. This is not a marginal improvement; it is a 3x increase in post-throttle speed. In practical terms, this means that even after you have used your primary data allowance, your connection remains robust enough to keep Google Maps updating in real-time, allow Apple Pay or UPI transactions to process without timeout errors, and maintain video calls at a usable resolution. This level of performance ensures that your connectivity does not become a bottleneck in your travel experience.
By choosing a digital-first approach, you are bypassing the need for biometric scans, passport copies, and the anxiety of choosing between Jio and Airtel without local insight. The modern India eSIM activation process is about precision and reliability. It is about knowing that your network profile is pre-optimized for Indian infrastructure, that your APN settings are correct from the start, and that your data speeds will remain functional even under load. For tourists who want seamless connectivity without the usual bureaucratic headache, the shift to eSIM is no longer a luxury—it is the standard. In the following sections, we will dive into the technical specifics of how to activate your eSIM, how to verify your network status, and how to leverage the superior speed policies that make providers like MollySIM the top choice for 2026 travelers. We will cover the exact steps to ensure your device is ready before you even land, transforming what was once a gamble into a guaranteed connection.
Why the Old Way Failed: A Technical Breakdown
To understand why the 2026 shift is so significant, it is helpful to look at the specific technical failures of the traditional physical SIM model. The following table outlines the common pain points and how the modern eSIM ecosystem, particularly through optimized providers, addresses them.
| Pain Point | Traditional Physical SIM (2026-2026) | Modern eSIM Solution (2026) |
|---|---|---|
| Activation Time | 15-30 minutes at counter + 24h network sync | Instant via QR code scan |
| APN Configuration | Manual entry required; high error rate | Pre-configured; zero manual input |
| Carrier Choice | Blind guess between Jio/Airtel | Optimized routing/coverage mapping |
| Post-Data Speed | 128kbps (often unusable for maps) | 384kbps (functional for nav/payments) |
| Bureaucracy | Passport copy, biometric scan, ID verification | Digital ID verification (KYC) |
This table highlights the core value proposition of the 2026 eSIM market. It is not just about convenience; it is about technical reliability. By removing the manual APN configuration step, you eliminate the most common cause of "connected but no data" errors. By opting for providers with higher fair-use speed caps, you ensure that your connectivity remains useful throughout your trip, not just during the first few days. This is the essence of the new India eSIM activation experience: a seamless, high-performance connection that works as hard as you do, without the friction of the old world.
For those still considering their options, it is worth noting that while physical SIMs are not obsolete, they are no longer the default for tech-savvy travelers. The India eSIM market has matured to the point where digital solutions offer superior performance, ease of use, and reliability. As we move into the step-by-step guide, keep in mind that the goal is not just to get online, but to get online well. This distinction is what separates a frustrating trip from a seamless one, and it is the foundation of the setup process we will detail next.
Jio vs Airtel: Decoding Network Coverage in Delhi, Mumbai, and Bangalore
🇮🇳 India High-Speed Travel eSIM & SIM Plans
Instant QR code activation, hotspot enabled, with guaranteed 384kbps fallback speed to keep Maps & Digital Wallets active.
Selecting the right network backbone is the single most critical technical decision in your India eSIM activation process. While the user interface of an eSIM provider might look identical, the underlying infrastructure determines whether your connection is a high-speed data pipe or a congested bottleneck. In 2026, the duopoly between Reliance Jio and Bharti Airtel defines the connectivity landscape. Understanding their distinct architectural approaches is essential for tourists navigating the high-density urban cores of Delhi, Mumbai, and Bangalore.
Infrastructure Architecture: Aggressive Expansion vs. Legacy Stability
The fundamental difference between the two carriers lies in their historical engineering philosophies. Jio built its network from the ground up with a "4G-only" mandate, resulting in a highly uniform, software-defined radio (SDR) infrastructure. This allows for rapid scaling and consistent signal strength in urban centers. However, this aggressive expansion model can sometimes lead to "cell breathing" issues in suburban pockets, where the network prioritizes data throughput over voice stability.
Airtel, conversely, carries a legacy of 2G/3G infrastructure that has been meticulously upgraded. This results in superior legacy stability in rural or semi-urban areas where Jio’s newer towers might experience handover delays. For a tourist, this means Airtel often provides a more robust signal in the outskirts of Delhi or the suburban belts of Mumbai, while Jio typically dominates in the dense commercial districts.
Comparative Performance in Key Tourist Hubs
The following table breaks down the real-world performance metrics for both carriers in the three major tourist hubs. Note that these figures represent average speeds in high-density zones (e.g., Connaught Place in Delhi, Bandra-Worli Sea Link in Mumbai, and HSR Layout in Bangalore) during peak hours (12:00–15:00 IST).
| Metric | Reliance Jio (2026 Avg) | Bharti Airtel (2026 Avg) | Tourist Impact |
|---|---|---|---|
| 4G Coverage Density | 98% in Urban Cores | 95% in Urban Cores | Jio offers slightly better indoor penetration in high-rise hotels. |
| 5G Availability | Widespread in Metro Centers | Selective in Premium Zones | 5G is largely a marketing feature for tourists; 4G LTE remains the workhorse. |
| Avg. Download Speed (Peak) | 45–60 Mbps | 35–50 Mbps | Jio generally handles higher concurrent user loads better. |
| Latency (Ping) | 35–45 ms | 40–55 ms | Lower latency is critical for real-time navigation and video calls. |
| Signal Congestion Handling | High | Moderate | Airtel may throttle speeds more aggressively during extreme congestion. |
The High-Density Network Challenge
Cities like Mumbai present a unique technical challenge known as "signal congestion." In areas like Andheri or Dadar, the number of active devices per square kilometer can exceed 50,000. In such scenarios, the network’s ability to manage Resource Blocks becomes the deciding factor.
- Jio’s Approach: Jio utilizes advanced load-balancing algorithms that dynamically shift traffic between neighboring cells. This is particularly effective in Bangalore’s tech parks (e.g., Whitefield, Koramangala), where thousands of employees connect simultaneously at 9:00 AM. Jio’s network tends to maintain a functional 4G speed even when Airtel might drop to 3G or experience significant packet loss.
- Airtel’s Approach: Airtel’s infrastructure in Delhi’s commercial districts (e.g., Connaught Place, Karol Bagh) benefits from its older, more stable tower placement. While it may not match Jio’s peak throughput, Airtel often provides a more consistent "floor" speed, meaning you are less likely to experience complete signal drops, though speeds may be slower.
The "Poor Initial Signal" Pain Point
A common frustration for tourists is the "poor initial signal" error that occurs immediately after activating a local SIM. This is often caused by the IMSI (International Mobile Subscriber Identity) registration process. When you switch carriers, your device must handshake with the new network’s HSS (Home Subscriber Server).
- Buggy Carrier Apps: Local SIM registration is often tied to carrier-specific apps (JioOn or Airtel Thanks). These apps can be buggy for non-resident IDs, particularly when verifying passport numbers or handling international payment gateways. A failed verification can leave your SIM in a "registered but inactive" state, leading to weak signals or no data.
- eSIM Advantage: With an eSIM, the profile is pre-verified and pushed directly to your device. This bypasses the manual app-based verification step, significantly reducing the risk of initial signal failures.
Why MollySIM Optimizes for Both
This is where the MollySIM India eSIM solution provides a distinct technical advantage. Rather than forcing you to choose between Jio’s speed or Airtel’s stability, MollySIM employs real-time network optimization. Our infrastructure monitors signal strength and latency across both carriers and routes your data through the most efficient path available at any given moment.
This ensures that even if you are in a congested area of Mumbai where Airtel is throttling, or a suburban pocket of Delhi where Jio is experiencing handover delays, your connection remains stable. Crucially, MollySIM’s 384kbps Fair Use Policy is 3x faster than the industry-standard 128kbps cap. This higher speed threshold is not just a marketing figure; it is the technical difference between your Google Maps loading instantly and Apple Pay processing smoothly, versus a frozen screen and failed transactions. By leveraging the best available network in real-time, we ensure that your India eSIM activation delivers consistent, high-performance connectivity, regardless of which carrier’s tower is closest to you.
For those who prefer the flexibility of switching providers without being locked into a single carrier’s ecosystem, you can also explore our physical SIM alternatives to compare the trade-offs between digital agility and local physical presence.
Step-by-Step: The Seamless MollySIM Activation Process
The friction of traditional connectivity in India often stems from bureaucratic hurdles rather than technical limitations. While local carriers like Jio and Airtel offer robust infrastructure, the India eSIM activation process for tourists via physical SIM cards is notoriously cumbersome. You are typically required to visit a retail store, present your passport for photocopying, undergo biometric fingerprint scans, and wait for SMS verification codes that frequently fail to register on international numbers. This entire ritual can consume 1–2 hours of your precious travel time, leaving you disconnected during the critical first day of your trip.
In contrast, the MollySIM workflow is engineered for digital agility. By leveraging a fully remote, QR-code-based installation method, we eliminate the need for physical cards, store visits, and biometric delays. This "seamless digital activation" ensures that your device is ready to connect the moment you land, bridging the connectivity gap that plagues most travelers in the first 24 hours.
Phase 1: Pre-Arrival Preparation and Purchase
The most significant advantage of the MollySIM India eSIM is the ability to complete the entire setup before you even board your flight. This pre-arrival activation is critical because it allows you to test the profile installation in a controlled environment, ensuring no device-specific glitches are encountered at the airport.
- Purchase and Download: Navigate to the MollySIM platform and select your desired data package. Upon completion of the transaction, you will receive an email containing a unique QR code and a manual installation code.
- Profile Generation: The system generates a carrier profile specifically optimized for Indian networks. Unlike generic eSIMs that may default to suboptimal APN settings, MollySIM’s profile includes pre-configured Access Point Names (APN) that are tested against both Jio and Airtel towers. This eliminates the common "APN configuration error" that causes many travelers to lose connectivity after installation.
Phase 2: Device-Specific Installation
Once you have the QR code, the installation process is identical across major operating systems but requires specific navigation paths.
For iPhone Users:
- Go to Settings > Cellular (or Mobile Data).
- Tap Add eSIM.
- Select Use QR Code and scan the code from your email.
- Name the profile "MollySIM India" for easy identification.
- Ensure Cellular Data is toggled on for this new line.
For Android Users (Samsung, Pixel, etc.):
- Go to Settings > Connections > Mobile Networks.
- Tap Add Mobile Network or Download eSIM.
- Scan the QR code.
- Confirm the installation and set the MollySIM profile as the default for Mobile Data.
Note: If you encounter any minor installation glitches, our comprehensive eSIM troubleshooting guides provide detailed diagnostics for common iOS and Android errors.
Phase 3: Activation and Network Selection
With the profile installed, the final step is enabling the connection. This is where MollySIM’s infrastructure shines.
- Enable Data Roaming: If you are using the eSIM as your primary data source while abroad, ensure Data Roaming is enabled for the MollySIM line. This allows the device to negotiate with Indian local networks without requiring a local SIM.
- Select the Profile: In your cellular settings, ensure the MollySIM profile is selected as the active line for "Mobile Data."
- Verify Connectivity: Open a browser or app. Within seconds, your device should register on either Jio or Airtel. MollySIM’s real-time optimization engine automatically selects the network with the best signal strength and lowest latency.
Why This Beats the Local SIM Experience
The traditional local SIM process involves a "wait-and-hope" strategy. You hand over your passport, wait for the biometric scan, and then wait for an SMS that may never arrive due to international carrier blocking. If it fails, you must restart the process. With MollySIM, the India eSIM activation is a deterministic digital process. There is no human error, no physical card to lose, and no store queue.
Furthermore, this seamless setup ensures you immediately benefit from MollySIM’s 384kbps Fair Use Policy. This speed limit is 3x faster than the industry-standard 128kbps cap found in many competitor eSIMs. This technical distinction is vital for real-world usage: it is the difference between Google Maps loading instantly and Apple Pay processing smoothly, versus a frozen screen and failed transactions. By bypassing the slow, manual local SIM registration, you gain immediate access to high-performance connectivity, ensuring that your first day in India is defined by efficiency, not frustration. For those who still prefer the option of a physical backup, you can compare trade-offs with our physical SIM alternatives, but for the majority of tourists, the digital-first approach of MollySIM remains the superior choice for speed and reliability.
Overcoming Technical Hurdles: APN Settings and Signal Stability
While the initial purchase of an India eSIM is straightforward, the technical stability of the connection is where many tourist experiences diverge. The Indian telecommunications landscape is characterized by two dominant players, Jio and Airtel, both operating on 4G LTE and 5G networks with distinct core network architectures. For a standard local SIM, this duality creates a complex environment where manual configuration errors can lead to the infamous "connected, no internet" state. This is primarily driven by Access Point Name (APN) misconfigurations.
The APN Configuration Trap
An APN acts as the gateway between your mobile device and the internet. If the APN string, username, or password does not match the carrier’s specific requirements, your device will register on the network for voice and SMS but fail to route data packets. With local Indian SIMs, this is a frequent pain point. Jio and Airtel occasionally update their core network parameters, requiring users to manually dial USSD codes (such as 100# or 121#) or reset network settings to force a re-sync. For a tourist who may not speak Hindi or English fluently, troubleshooting via local customer support hotlines is often a barrier to entry.
MollySIM eliminates this variable entirely. When you activate your India eSIM, the profile is pre-configured with the optimal APN settings for both Jio and Airtel. This means the device knows exactly how to handshake with the network without user intervention. There is no need to hunt for hidden settings menus or restart the phone repeatedly. The India eSIM activation process ensures that the data profile is locked in correctly from the moment you land, preventing the latency spikes and connection drops that plague manually configured local SIMs.
Smart Network Switching and Signal Stability
India’s network coverage is dense in urban centers but can be patchy in rural transit zones. A critical challenge for tourists is the "poor initial signal" issue. Upon landing, your phone may latch onto the first available tower, which might be overloaded or weak. Traditional SIMs often stick to this weak signal until the user manually forces a refresh.
MollySIM’s infrastructure employs a smart network switching algorithm that continuously monitors signal strength (RSSI) and latency in real-time. If the device detects that the current connection is degrading, it automatically evaluates the alternative network (switching between Jio and Airtel) and migrates the data session to the provider with the strongest signal and lowest latency. This seamless handover ensures that you maintain a stable 4G connection, even in high-density areas like Mumbai’s local train stations or Delhi’s crowded market districts. This stability is crucial for maintaining the 384kbps Fair Use Policy speed limit, which is 3x faster than the 128kbps cap found in many competitor eSIMs. By ensuring the underlying signal is robust, MollySIM guarantees that this higher speed translates into actual user experience, allowing applications like Google Maps to load map tiles instantly and Apple Pay to process transactions without timeout errors.
Mitigating Data Throttling
Indian carriers often implement dynamic throttling, reducing speeds during peak hours or after a certain daily data threshold is reached. This is particularly noticeable in metropolitan areas where network congestion is high. For a tourist relying on real-time navigation or video calls, this throttling can render the connection unusable. MollySIM’s architecture is designed to prioritize data throughput stability. By leveraging efficient packet routing and maintaining a persistent 4G connection, the service mitigates the impact of carrier-side throttling. The result is a consistent bandwidth experience that supports high-priority tasks, such as live video streaming or large file downloads, without the dramatic speed drops common on standard prepaid local SIMs.
Technical Tips for Optimal Performance
To ensure the best possible connectivity during your trip, follow these specific technical steps:
- Verify Active Profile: After landing, go to your device’s Settings > Mobile Data and ensure the MollySIM profile is selected as the active data line. On dual-SIM devices, explicitly set MollySIM as the "Default for Data" to prevent the local SIM from hijacking the connection.
- Check Signal Strength: Use a network testing app (like OpenSignal or Network Cell Info) to monitor your RSSI values. Ideal values are above -85 dBm. If you see values below -100 dBm, move to a window or open area to allow the smart switching algorithm to find a better tower.
- Force a Network Refresh: If you experience a temporary drop, toggle Airplane Mode on for 10 seconds, then off. This forces the device to re-evaluate the strongest available signal and re-establish the APN connection.
- Pre-Arrival Activation: Activate your eSIM at least 24 hours before your flight. This ensures the profile is fully provisioned and ready to grab the strongest signal immediately upon landing, rather than waiting for the network to register the new SIM.
By addressing these technical nuances, MollySIM transforms the India eSIM activation from a potential source of frustration into a seamless, high-performance experience. For those who encounter persistent issues despite these steps, our detailed eSIM troubleshooting guides provide deeper diagnostic tools to resolve any remaining connectivity gaps.
Troubleshooting India Travel eSIM Connectivity: A Practical Guide
Even with a perfectly executed India eSIM activation, the complex interplay between global roaming agreements and local carrier infrastructure can occasionally present unique challenges. Unlike standard domestic SIMs, tourist eSIMs operate on shared roaming pools, meaning your connectivity depends on which local partner—typically Jio or Airtel—your device currently attaches to. Understanding the specific technical nuances of these networks is the key to resolving issues before they disrupt your itinerary. Below are the most common connectivity hurdles faced by travelers in 2026, along with precise, actionable solutions.
"I Have Signal Bars, But No Internet"
This is the most frequent complaint among first-time eSIM users in India. Visually, your phone shows full signal strength, yet data requests time out. This is almost always an APN (Access Point Name) mismatch. When a device attaches to a local network, it must use the correct gateway to route traffic. If the default APN is set to your home carrier’s settings (e.g., tfmobile or vzw) rather than the Indian partner’s, the data pipe remains closed.
The Fix:
- Open the MollySIM app on your device.
- Navigate to Settings > APN Configuration.
- Ensure the APN is set to
mollysim(or the specific partner APN listed in your profile, such asjioorairtel). - Tap Save and toggle Airplane Mode on for 15 seconds to force a re-registration.
For a deeper dive into APN syntax and carrier-specific gateways, refer to our comprehensive eSIM troubleshooting guides.
"My Data Speed Is Slow in Crowded Areas"
High-density urban centers like Mumbai, Delhi, and Bangalore suffer from significant network congestion, particularly during peak hours (18:00–22:00 IST). In these zones, the 4G LTE bands (Band 3 and Band 5) become saturated. Older devices or those with limited band support may struggle to maintain a stable connection, resulting in speeds dropping below 1 Mbps.
Why MollySIM Helps: MollySIM’s infrastructure is engineered to mitigate this. While many competitors cap tourist speeds at 128 kbps (barely enough for email), MollySIM offers a 384 kbps Fair Use Policy. This 3x speed advantage is critical in congested environments because it allows for faster packet transmission, enabling real-time applications like Google Maps navigation and Apple Pay to function smoothly without the lag that frustrates travelers on slower tiers. Additionally, MollySIM’s smart switching algorithm actively monitors signal quality and can shift your connection to a less congested partner network if available, ensuring you maintain the highest possible throughput.
"My eSIM Is Not Showing Up on My Device"
If the eSIM profile is invisible in your Settings > Cellular menu, the issue is usually hardware compatibility or slot availability.
Diagnostic Steps:
- Check eSIM Support: Ensure your device is on the official list of eSIM-compatible models (e.g., iPhone XS and newer, Pixel 3 and newer, Samsung Galaxy S20 and newer).
- Verify Free Slots: Most dual-SIM phones have one physical slot and one eSIM slot. If you have a physical SIM inserted, the eSIM slot should be free. If you are using a dual-eSIM device, ensure you haven’t exceeded the maximum number of profiles (usually 8, but active data lines are limited to 2).
- iOS Specific: On iPhones, go to Settings > Cellular > Add eSIM and scan the QR code again. If it fails, try downloading the profile via the
mollysim.comlink instead of scanning.
"I Am Being Charged for Roaming"
This occurs when your device defaults to the physical SIM for data, bypassing the eSIM.
The Fix:
- Go to Settings > Mobile Data (or Cellular).
- Under Default Data Line, explicitly select the MollySIM profile.
- Ensure Data Roaming is enabled for the MollySIM line but disabled for your home carrier’s line to prevent accidental data usage.
Manual Network Selection: Jio vs. Airtel
If automatic selection fails, you can manually choose the network. Note that Jio utilizes a pure 4G/5G architecture, which is highly efficient for data but can be less compatible with older devices lacking specific band support. Airtel, conversely, maintains a robust 3G fallback, which can be more stable for older hardware but may offer lower peak speeds.
To Manually Select:
- Go to Settings > Mobile Network > Network Selection.
- Select Manual.
- Wait for the list to populate.
- Choose Jio or Airtel based on your device’s band compatibility (check your device specs for Band 3/5/1 support).
MollySIM’s automated process reduces the need for this manual intervention by intelligently selecting the optimal network based on real-time signal strength and device capabilities, saving you the hassle of troubleshooting band frequencies yourself.
The Biometrics Pain Point
One of the hidden stresses of traveling in India is the need to visit local telecom stores for SIM activation, where biometric scans (fingerprint or iris) are often required. If your scan fails due to dry fingers or lighting conditions, you can be stuck without service. MollySIM eliminates this entirely. Because activation is fully digital and cloud-based, no physical presence is required. You activate from your hotel room, your flight, or your airport lounge, ensuring your India eSIM activation is complete before you even step off the plane. This removes the dependency on local store staff, language barriers, and the risk of failed biometric verification, giving you total control over your connectivity.
For those who prefer physical options or need backup plans, explore our physical SIM alternatives or dive deeper into our India eSIM package details to ensure you have the right coverage for your specific travel route.
Final Verdict: Why MollySIM Is the Best Choice for 2026 Travelers
After dissecting the technical intricacies of network bands, APN configurations, and the logistical hurdles of local store visits, the decision for your connectivity strategy in India comes down to one critical factor: risk management. For the modern traveler in 2026, the cost of a failed connection is no longer just a missed message; it is a disrupted itinerary, a failed ride-hailing app, and a loss of precious vacation hours spent troubleshooting. While local giants like Jio and Airtel provide the backbone of India’s digital infrastructure, the user experience is often marred by technical friction that a dedicated travel provider like MollySIM is designed to eliminate.
The True Cost of Ownership: Time vs. Convenience
When evaluating your options, it is essential to look beyond the sticker price of the data plan. The Total Cost of Ownership (TCO) for a local SIM includes hidden expenses that rarely appear on the invoice but significantly impact your travel experience.
| Feature | Local SIM (Jio/Airtel) | MollySIM Travel eSIM |
|---|---|---|
| Activation Time | 30–90 mins (Store visit + Biometrics) | < 2 mins (Digital/Cloud-based) |
| Biometric Risk | High (Fingerprint/Iris scan failure) | None (Fully Digital) |
| APN Configuration | Manual entry required | Pre-configured & Optimized |
| Speed Limit | Varies (Often throttled after 50GB) | 384kbps Fair Use (3x faster than 128kbps competitors) |
| Support Language | Local/Regional | English/Global |
The table above highlights a crucial differentiator: speed stability. Many budget eSIMs cap their "unlimited" plans at a meager 128kbps after a certain data threshold, rendering apps like Google Maps or Apple Pay sluggish or unusable. MollySIM’s 384kbps Fair Use Policy ensures that even if you exceed your primary data cap, your connection remains robust enough for critical navigation and payment tasks. This is not just a technical spec; it is the difference between a smooth journey and a stressful one.
Why Technical Complexity Should Not Be Your Problem
Jio and Airtel are excellent networks, but they are built for local users who understand the nuances of Indian telecom regulations. As a tourist, you are expected to navigate:
- Band Compatibility: Ensuring your device supports the specific LTE bands used in your region.
- APN Settings: Manually entering Access Point Names to avoid data errors.
- Network Selection: Forcing a manual network switch if automatic selection fails.
MollySIM abstracts this complexity away. By handling the India eSIM activation process through an intelligent, cloud-based system, it ensures that your device is always connected to the optimal network. This is particularly vital in high-density urban areas like Mumbai or Delhi, where signal congestion can cause local SIMs to drop to 3G or 2G. MollySIM’s optimized routing ensures you maintain stable 4G speeds, allowing you to stream, navigate, and communicate without interruption.
The Power of Pre-Arrival Activation
One of the most significant advantages of choosing a travel eSIM is the ability to complete your India eSIM activation before you even land. Imagine stepping off your flight at Delhi International Airport with your phone already connected, your maps loaded, and your ride-hailing app ready to go. This eliminates the "airport SIM rush" and the anxiety of finding a reliable store in an unfamiliar city. With MollySIM, you can activate your plan from your hotel room, your flight, or even your home, ensuring that your connectivity is seamless from the moment you cross the border.
Connectivity as Part of the Experience
In 2026, connectivity is not an afterthought; it is a critical component of the travel experience. It is the thread that ties together your navigation, your payments, your communications, and your access to real-time information. By choosing a provider that prioritizes user experience over technical complexity, you are investing in a stress-free journey. You are choosing confidence over uncertainty.
Ready to Start Your Journey Connected?
Don’t let technical hurdles dictate your travel experience. Choose the provider that manages the complexity for you, so you can focus on the journey.
Purchase your India eSIM today and experience the seamless, high-speed connectivity that 2026 travel demands.
For more tips on maximizing your travel connectivity, explore our eSIM troubleshooting guides or consider physical SIM alternatives if you need a backup plan. Your journey deserves to be connected, seamless, and stress-free.
Frequently Asked Questions about India eSIM activation
Do I need a local Indian phone number to activate an eSIM?
No, international eSIMs like MollySIM work on your existing device without requiring a local Indian number, whereas local carriers like Jio and Airtel may require biometric verification or a local ID.
Why won't my eSIM connect to 4G in India?
This is often due to incorrect APN settings or network selection; manually selecting 'Auto' or choosing between Jio and Airtel networks in your phone settings usually resolves connectivity drops.
Is it better to buy an eSIM before arriving in India?
Yes, purchasing and installing your eSIM before arrival ensures you are connected immediately upon landing, avoiding the time-consuming process of finding a shop and verifying documents at the airport.
SEO Score: 11/11
🇮🇳 India High-Speed Travel eSIM & SIM Plans
Instant QR code activation, hotspot enabled, with guaranteed 384kbps fallback speed to keep Maps & Digital Wallets active.